
Crochet pumpkin free patterns are a fun and creative way to make cozy handmade decorations for the fall season. In this collection, you’ll find ten complete, start-to-finish crochet pumpkin patterns with exact stitch counts at the end of every round, materials, assembly, stuffing, stem, and finishing instructions. All ten patterns are worked in continuous spiral rounds without joining or turning, unless a pattern specifically says otherwise.
Abbreviations (used throughout)
| Abbreviation | Meaning |
|---|---|
| ch | chain |
| sl st | slip stitch |
| sc | single crochet |
| dc | double crochet |
| inc | increase — 2 sc worked in the same stitch |
| dec | decrease — single crochet 2 stitches together (sc2tog) |
| MR | magic ring (adjustable ring) |
| st(s) | stitch(es) |
| rnd(s) | round(s) |
| BLO | back loop(s) only |
| ( ) x 6 | work the instructions in parentheses 6 times total |
| [ ] | stitch count at the end of the round/row |
Pattern-specific stitches (bobble, puff, fpdc) are defined in the pattern that uses them. Unless noted, all pieces are worked with the right side facing throughout and stitch markers are recommended in the first stitch of every round.
1. Classic Ribbed Crochet Pumpkin Free Pattern
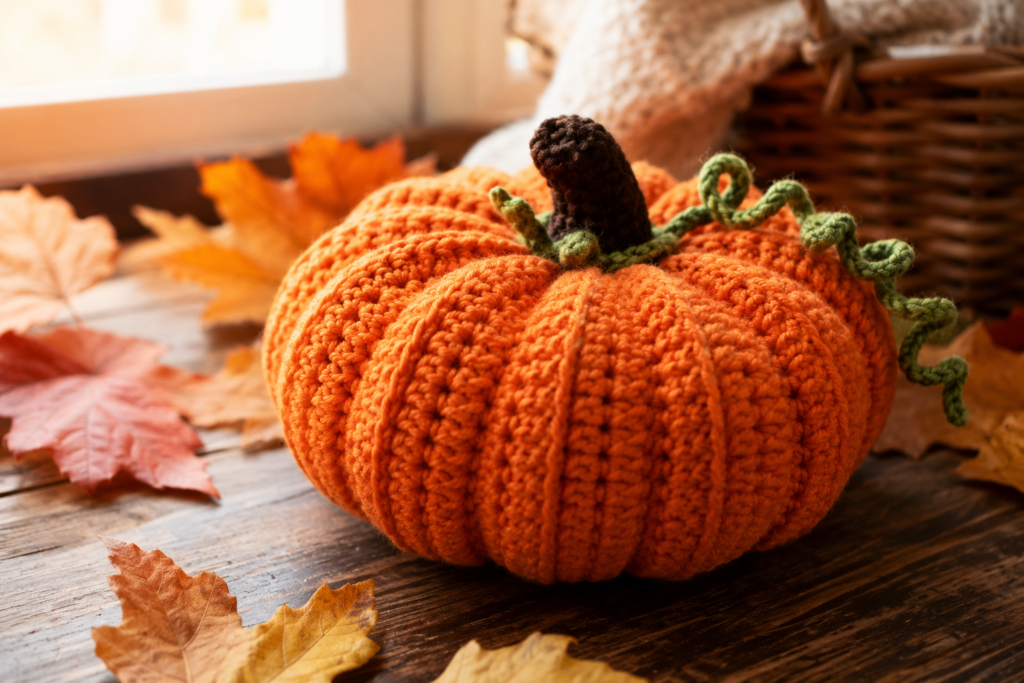
Skill level: Beginner Finished size: Approximately 4–4.5 in. diameter, 3.5 in. tall Yarn: Worsted weight (Category 4), approx. 45 yds main color (orange) + 5 yds green or brown for stem Hook: 4.5mm (US 7) Notions: Fiberfill stuffing, yarn needle, stitch marker, scissors
Body
- Rnd 1: 6 sc in MR. [6]
- Rnd 2: inc in each st around. [12]
- Rnd 3: (sc 1, inc) x 6. [18]
- Rnd 4: (sc 2, inc) x 6. [24]
- Rnd 5: (sc 3, inc) x 6. [30]
- Rnd 6: (sc 4, inc) x 6. [36]
- Rnds 7–12: sc even (6 rnds). [36]
- Rnd 13: (sc 4, dec) x 6. [30]
- Rnd 14: (sc 3, dec) x 6. [24]
- Rnd 15: (sc 2, dec) x 6. [18] — begin stuffing firmly now
- Rnd 16: (sc 1, dec) x 6. [12]
- Rnd 17: dec x 6. [6]
Finish stuffing, fasten off leaving a 6 in. tail, thread onto yarn needle and weave through the front loops of the remaining 6 sts, pull closed, and secure with a knot on the inside.
Stem
- Rnd 1: 6 sc in MR (brown or green). [6]
- Rnds 2–5: sc even (4 rnds). [6]
Fasten off leaving a long tail for sewing. Do not stuff, or add a small pinch only — a flat stem sews on more neatly than a puffy one.
Assembly & Segment Lines
Thread a long length of yarn (matching or contrasting) onto your yarn needle. Insert it through the very center of the top closure, run it straight down through the stuffing to the center of the bottom closure, then back up through a point on the surface about 1/6 of the way around, back down through the center, and back up at the next 1/6 point. Repeat until you have 6 evenly spaced lines running pole to pole, pulling snug (not tight enough to pucker) after each pass. Knot off on the underside.
Finishing
Flatten the open end of the stem and sew it to the center top of the pumpkin, right over the point where your segment lines converge. Weave in all remaining ends.
2. Mini Crochet Pumpkin Free Patterns for Quick Fall Décor
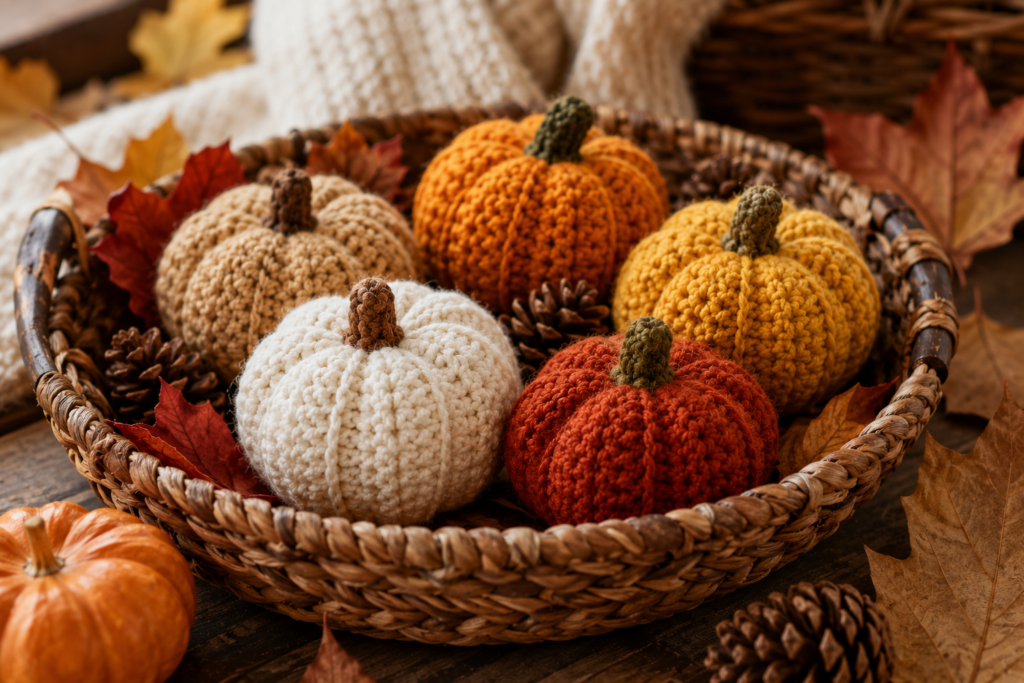
Skill level: Beginner Finished size: Approximately 1.5–2 in. diameter Yarn: DK or worsted weight scraps, approx. 8 yds main color Hook: 3.5mm (US E/4) Notions: A pinch of fiberfill, yarn needle, stitch marker
Body
- Rnd 1: 6 sc in MR. [6]
- Rnd 2: inc in each st around. [12]
- Rnd 3: (sc 1, inc) x 6. [18]
- Rnds 4–5: sc even (2 rnds). [18] — stuff lightly now
- Rnd 6: (sc 1, dec) x 6. [12]
- Rnd 7: dec x 6. [6]
Fasten off leaving a 4 in. tail, close the top the same way as Pattern 1.
Stem
- Rnd 1: 4 sc in MR. [4]
- Rnds 2–3: sc even (2 rnds). [4]
Fasten off, sew flattened end to top center.
Assembly & Finishing
Because minis are small, 4 segment lines (rather than 6) usually read more clearly — space them evenly around the pumpkin using the same pole-to-pole technique from Pattern 1. These work up quickly enough to batch — a set of 8–10 makes a full garland or bowl-filler in one sitting.
3. Chunky Crochet Pumpkin Free Patterns for Cozy Home Décor
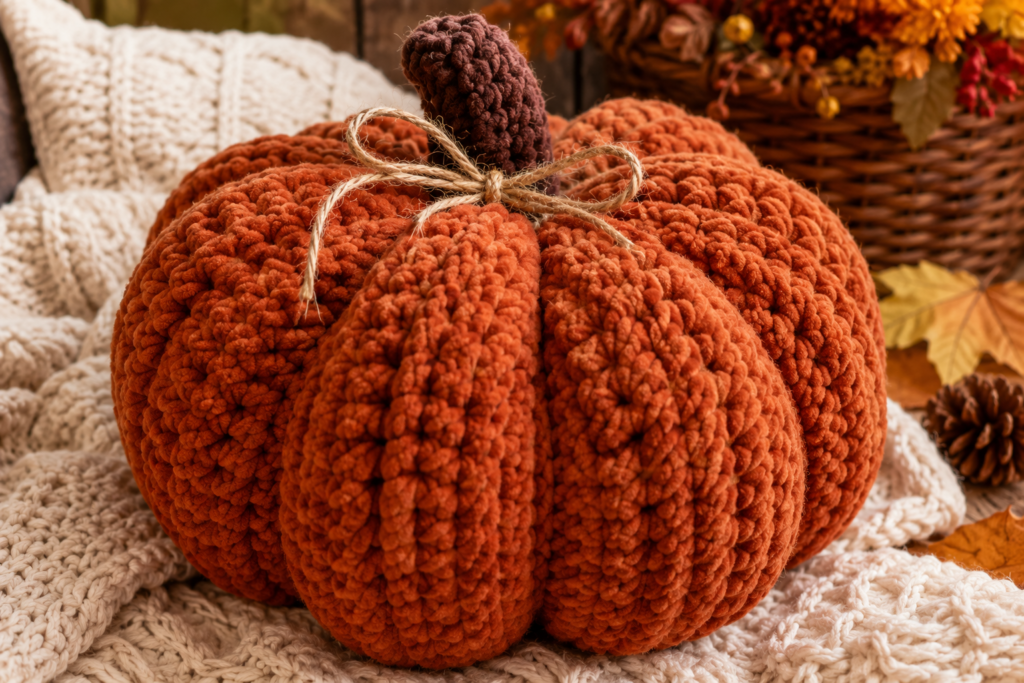
Skill level: Beginner Finished size: Approximately 6–7 in. diameter, 5 in. tall Yarn: Bulky/Category 5, approx. 90 yds main color Hook: 8mm (US L/11) Notions: Fiberfill (extra — chunky pumpkins take more than they look like they will), yarn needle, stitch marker
Body
- Rnd 1: 6 sc in MR. [6]
- Rnd 2: inc in each st around. [12]
- Rnd 3: (sc 1, inc) x 6. [18]
- Rnd 4: (sc 2, inc) x 6. [24]
- Rnds 5–8: sc even (4 rnds). [24]
- Rnd 9: (sc 2, dec) x 6. [18] — begin stuffing
- Rnd 10: (sc 1, dec) x 6. [12]
- Rnd 11: dec x 6. [6]
Fasten off, close top as in Pattern 1.
Stem
- Rnd 1: 6 sc in MR. [6]
- Rnd 2: inc in each st around. [12]
- Rnds 3–4: sc even (2 rnds). [12]
- Rnd 5: dec x 6. [6]
Fasten off leaving a tail; this slightly-shaped stem (wider base, narrower top) reads better at this scale than a straight tube.
Assembly & Finishing
Stuff in layers, pressing fiberfill evenly toward the sides as you go so the finished shape doesn’t end up soft or lopsided in the middle. Add 6 segment lines as in Pattern 1 — with bulky yarn, pull them gently; over-tightening can distort the larger stitches.
4. Granny Square Crochet Pumpkin Free Pattern
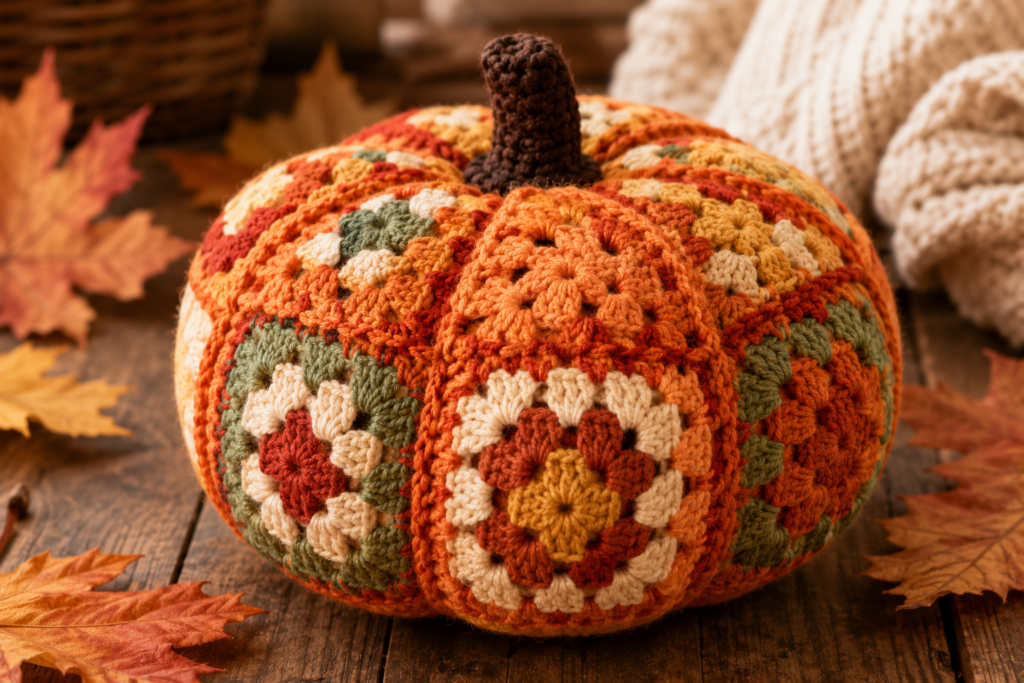
Skill level: Advanced beginner (comfortable with basic dc and joining) Finished size: Approximately 4–4.5 in. square before rounding Yarn: DK or worsted weight, Color A (orange) and Color B (cream or rust) for the final round Hook: 4.5mm (US 7) Notions: Fiberfill, yarn needle, stitch marker Note: Ch-3 at the start of a round counts as the first dc throughout.
Granny Square (make 2, identical)
- Rnd 1 (Color A): MR, ch 3 (counts as first dc), 2 dc in ring, ch 2, [3 dc in ring, ch 2] x 3, join with sl st to top of beg ch-3. [4 dc-groups]
- Rnd 2 (join Color B): Join in any ch-2 corner sp. Ch 3, (2 dc, ch 2, 3 dc) in same sp, ch 1, (3 dc, ch 2, 3 dc) in next corner sp, ch 1, repeat from * around 2 more times, join. [4 corner shells]
- Rnd 3 (Color A): Join in any corner ch-2 sp. Ch 3, (2 dc, ch 2, 3 dc) in same sp, ch 1, 3 dc in next ch-1 sp, ch 1, (3 dc, ch 2, 3 dc) in next corner sp, ch 1, 3 dc in next ch-1 sp, ch 1, repeat from * around, join, fasten off.
Weave in ends. Make a second square exactly the same way.
Assembly & Stuffing
Hold the two squares with wrong sides together, matching corners. Using Color A and a yarn needle, whip stitch through both loops of both squares around 3 full sides. Stuff firmly, pushing fiberfill well into the corners, then whip stitch the fourth side closed, leaving a 1.5 in. gap. Finish stuffing through the gap, then close it completely.
To round out the pillow shape, thread a length of yarn through the center of one corner (this will be the top), pull it snugly through the stuffing to the opposite corner, and tack both corners in slightly toward the center. This softens the square silhouette into more of a rounded pumpkin without losing the visible granny-square seams, which read as natural segment lines.
Stem
- Rnd 1: 6 sc in MR. [6]
- Rnds 2–4: sc even (3 rnds). [6]
Fasten off, flatten, and sew to the tacked-in top corner.
Finishing
Weave in any remaining ends. The seam lines between rounds and the whip-stitched edges naturally create the pumpkin’s ridged look, so no additional segment lines are needed.
5. Textured Crochet Pumpkin Free Pattern (Puff Stitch)
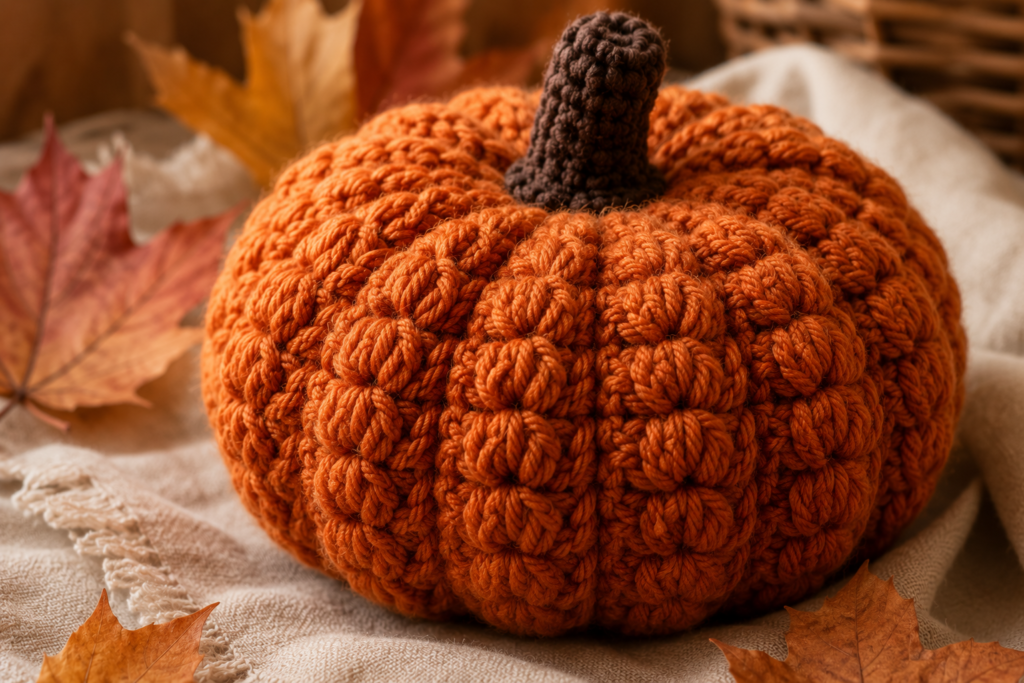
Skill level: Advanced beginner Finished size: Approximately 4–4.5 in. diameter, 3.5 in. tall Yarn: Worsted weight, approx. 55 yds Hook: 5mm (US H/8) Notions: Fiberfill, yarn needle, stitch marker
Special stitch — Puff Stitch (Puff): [Yarn over, insert hook in indicated st, yarn over, pull up a loop] 3 times in the same st (7 loops on hook). Yarn over, draw through all 7 loops. Chain 1 to close (the ch-1 does not count as a st).
Body
- Rnd 1: 6 sc in MR. [6]
- Rnd 2: inc in each st around. [12]
- Rnd 3: (sc 1, inc) x 6. [18]
- Rnd 4: (sc 2, inc) x 6. [24]
- Rnd 5: (sc 3, inc) x 6. [30]
- Rnd 6: (sc 4, inc) x 6. [36]
- Rnd 7 (Puff rnd): (sc 5, Puff in next st) x 6. [36]
- Rnd 8: sc even. [36]
- Rnd 9 (Puff rnd): (sc 5, Puff in next st) x 6, working each Puff directly above the Puff from Rnd 7 to build a vertical ridge. [36]
- Rnd 10: sc even. [36]
- Rnd 11 (Puff rnd): repeat Rnd 9. [36]
- Rnd 12: sc even. [36]
- Rnd 13: (sc 4, dec) x 6. [30]
- Rnd 14: (sc 3, dec) x 6. [24]
- Rnd 15: (sc 2, dec) x 6. [18] — begin stuffing
- Rnd 16: (sc 1, dec) x 6. [12]
- Rnd 17: dec x 6. [6]
Finish stuffing, fasten off, close top as in Pattern 1.
Stem & Assembly
Work the stem exactly as in Pattern 1 (6 sc in MR, sc even for 4 rnds) and sew to the top center. The 6 puff columns already create raised vertical ridges, so additional pulled segment lines are optional — skip them for a poufier texture, or add light ones between the puff columns for more definition.
Finishing
Weave in all ends, making sure puff-stitch tails are secured on the inside where they won’t work loose with handling.
6. Cute Amigurumi Crochet Pumpkin Free Pattern
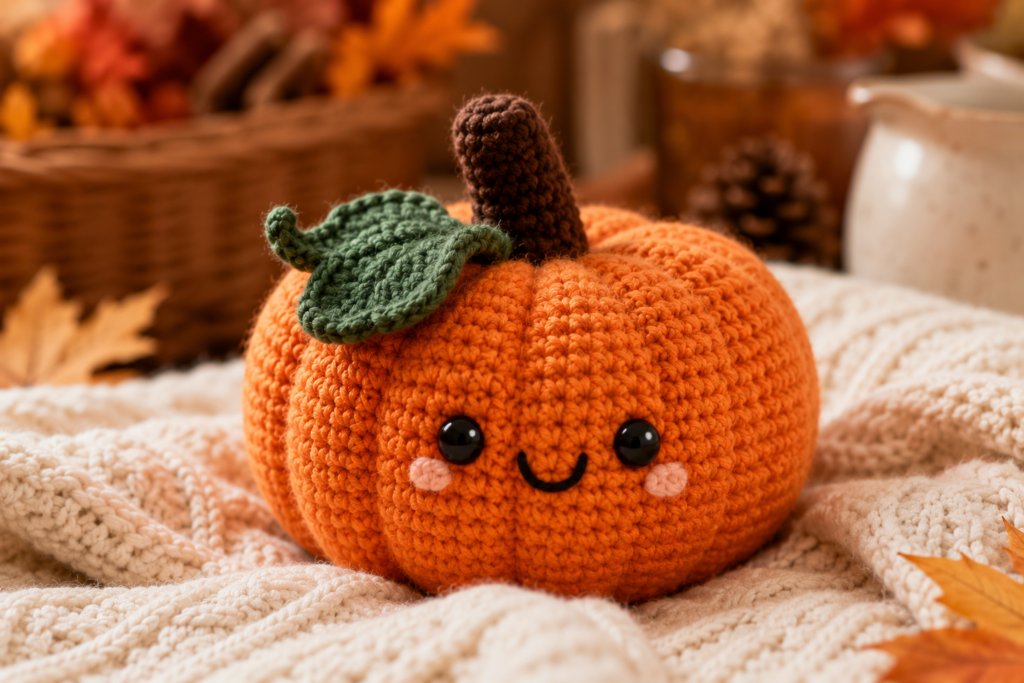
Skill level: Beginner Finished size: Approximately 3 in. diameter Yarn: Worsted weight, approx. 30 yds main color, small amount of black for face Hook: 4.5mm (US 7) Notions: Fiberfill, yarn needle, stitch marker, optional 6mm safety eyes
Body
- Rnd 1: 6 sc in MR. [6]
- Rnd 2: inc in each st around. [12]
- Rnd 3: (sc 1, inc) x 6. [18]
- Rnd 4: (sc 2, inc) x 6. [24]
- Rnd 5: (sc 3, inc) x 6. [30]
- Rnds 6–8: sc even (3 rnds). [30]
- Rnd 9: (sc 3, dec) x 6. [24] — begin stuffing
- Rnd 10: (sc 2, dec) x 6. [18]
- Rnd 11: (sc 1, dec) x 6. [12]
- Rnd 12: dec x 6. [6]
Finish stuffing, fasten off, close top as in Pattern 1.
Face
If using safety eyes, insert them between Rnds 6 and 7, spacing them 5 sts apart and centering the pair on the round — this must happen before you stuff and close the piece. If embroidering instead, work the eyes after finishing: two small satin-stitch dots at the Rnd 6–7 line, 5 sts apart, with a short curved backstitch smile one round below.
Stem
- Rnd 1: 6 sc in MR. [6]
- Rnds 2–3: sc even (2 rnds). [6]
Fasten off and sew to top center — the shorter stem keeps the proportions cute rather than rustic.
Assembly & Finishing
Add 5–6 light segment lines as in Pattern 1, pulled gently so the round, cheerful shape isn’t flattened. Weave in all ends.
7. Rustic Crochet Pumpkin Free Pattern with Long Stem
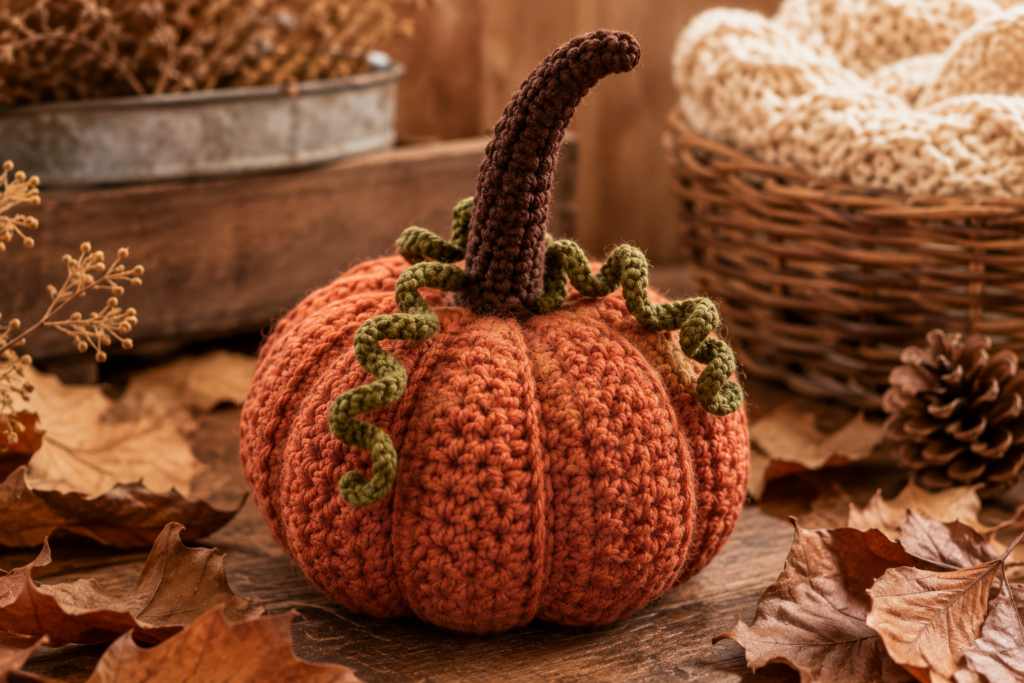
Skill level: Beginner Finished size: Approximately 4.5 in. diameter, 3.5 in. tall, plus a 3 in. stem Yarn: Worsted weight in a muted rust, cream, or brown, approx. 60 yds; small amount of brown for stem and vine Hook: 5mm (US H/8) Notions: Fiberfill, yarn needle, stitch marker
Body
- Rnd 1: 6 sc in MR. [6]
- Rnd 2: inc in each st around. [12]
- Rnd 3: (sc 1, inc) x 6. [18]
- Rnd 4: (sc 2, inc) x 6. [24]
- Rnd 5: (sc 3, inc) x 6. [30]
- Rnds 6–10: sc even (5 rnds). [30]
- Rnd 11: (sc 3, dec) x 6. [24]
- Rnd 12: (sc 2, dec) x 6. [18] — begin stuffing
- Rnd 13: (sc 1, dec) x 6. [12]
- Rnd 14: dec x 6. [6]
Finish stuffing, fasten off, close top as in Pattern 1.
Long Stem
- Rnd 1: 6 sc in MR. [6]
- Rnds 2–9: sc even (8 rnds). [6]
Fasten off leaving a long tail. Before attaching, bend the tube gently to one side with your fingers — a stem that leans slightly reads as far more rustic than one standing straight up.
Curly Vine
Ch 20. Starting in the 2nd ch from hook, sl st into each ch across, working through the back loop only of each chain — this makes the strip curl naturally into a spiral. Fasten off, leaving tails at both ends.
Assembly & Finishing
Sew the flattened base of the long stem to the top center of the pumpkin. Tack one end of the curly vine to the base of the stem so it winds around it. Add 6 segment lines in a slightly contrasting muted tone (as in Pattern 1) for extra dimension, and weave in all ends.
8. Striped Crochet Pumpkin Free Pattern
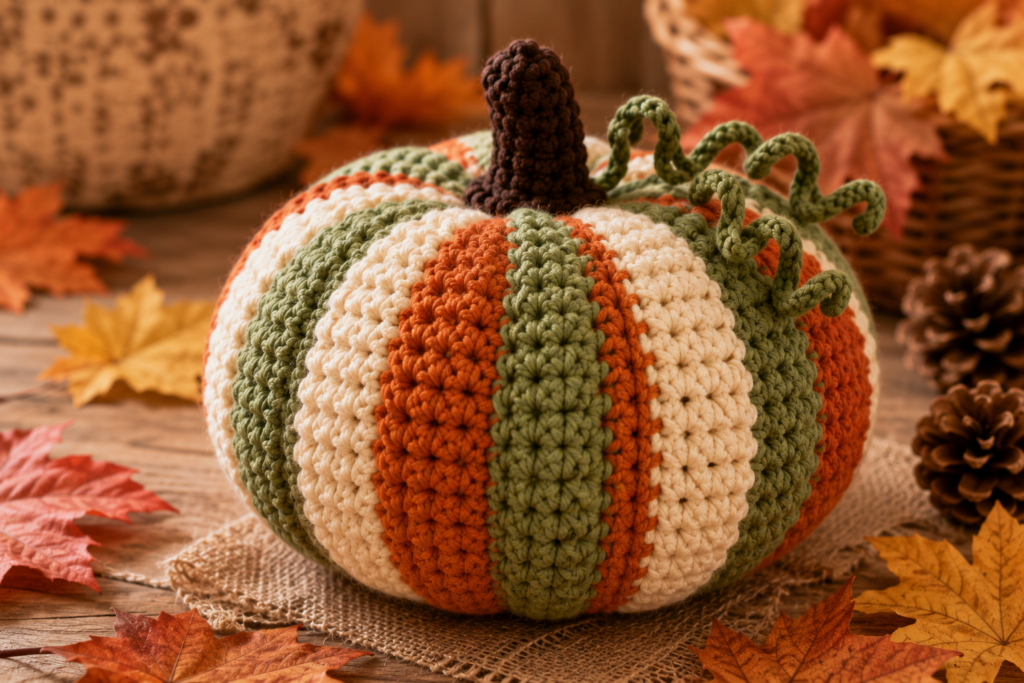
Skill level: Beginner Finished size: Approximately 3.5 in. diameter, 4 in. tall Yarn: Worsted weight, Color A (approx. 30 yds) and Color B (approx. 20 yds) Hook: 5mm (US H/8) Notions: Fiberfill, yarn needle, stitch marker
Body
- Rnd 1 (Color A): 6 sc in MR. [6]
- Rnd 2: inc in each st around. [12]
- Rnd 3: (sc 1, inc) x 6. [18]
- Rnd 4: (sc 2, inc) x 6. [24]
- Rnds 5–6 (join Color B): sc even (2 rnds). [24]
- Rnds 7–8 (join Color A): sc even (2 rnds). [24]
- Rnds 9–10 (join Color B): sc even (2 rnds). [24]
- Rnd 11 (join Color A): (sc 2, dec) x 6. [18] — begin stuffing
- Rnd 12: (sc 1, dec) x 6. [12]
- Rnd 13: dec x 6. [6]
To change color, work the last stitch before the switch until 2 loops remain on the hook, then yarn over with the new color and draw through — the new color is ready for the first stitch of the next round. Carry the unused color loosely up the inside of the work rather than cutting it each time.
Finish stuffing, fasten off, close top as in Pattern 1.
Stem
- Rnd 1 (Color A): 6 sc in MR. [6]
- Rnds 2–5: sc even (4 rnds). [6]
Fasten off, sew to top center.
On sale products
-
3D Daisy Keychain Crochet Pattern | Puff Stitch Flower PDF | Easy Crochet Gift Tutorial
$5.00$3.00 -
Alien Crochet Pattern Bundle, Amigurumi Plushie, Keychain Toy (PDF Download)
$6.00$3.00 -
Amigurumi Fruit Keychain PDF, Kawaii Bag Charm Tutorial, Beginner DIY Gift Project, Easy Handmade
$5.00$3.00 -
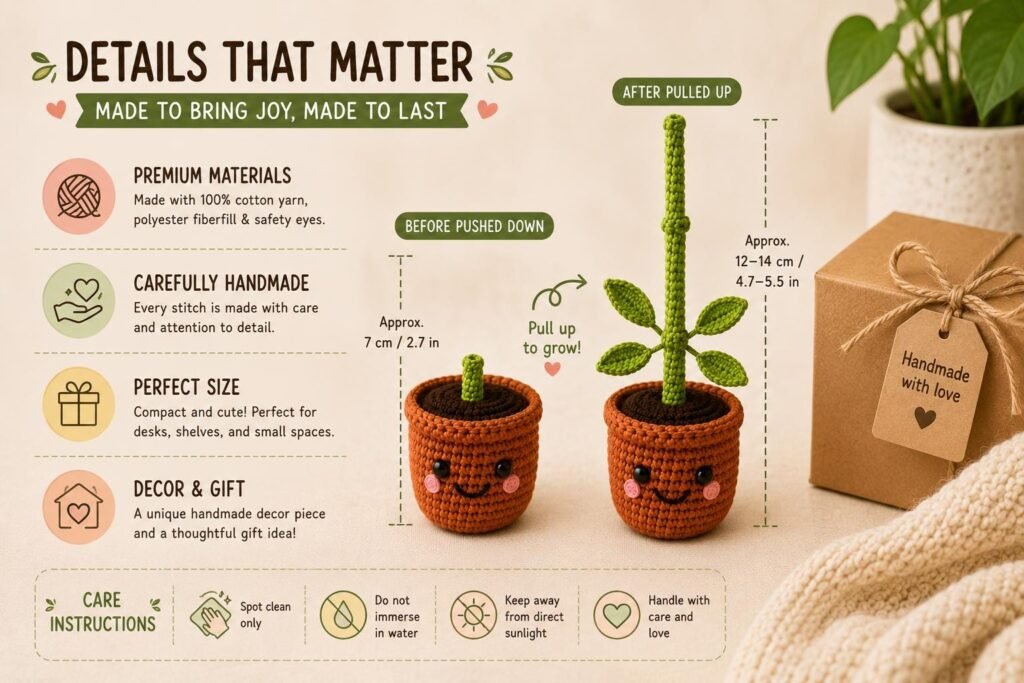
Amigurumi Plant Crochet Pattern PDF | Interactive Pull & Grow Pot Plant For Beginners
$6.00$3.00 -
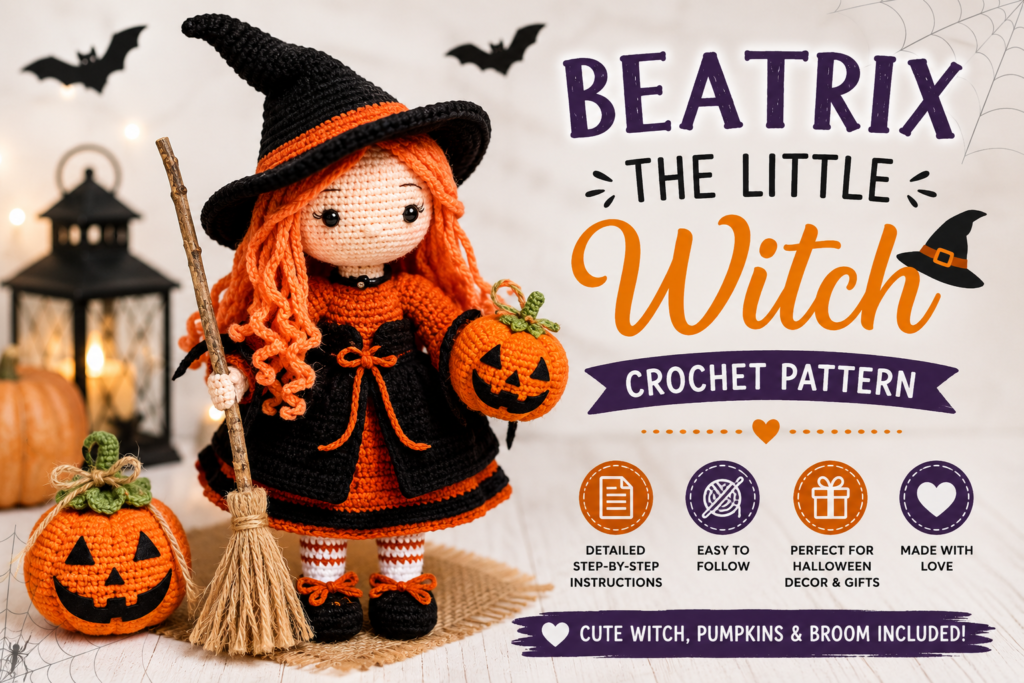
Beatrix the Little Witch Crochet Pattern PDF
$6.00$3.00
Assembly & Finishing
Because the stripes already break up the surface visually, 4 segment lines (rather than 6) worked in Color A tend to look cleanest — space them evenly using the pole-to-pole technique from Pattern 1. Weave in all ends, making sure color-change tails are secured on the inside.
9. Bobble Stitch Crochet Pumpkin Free Pattern
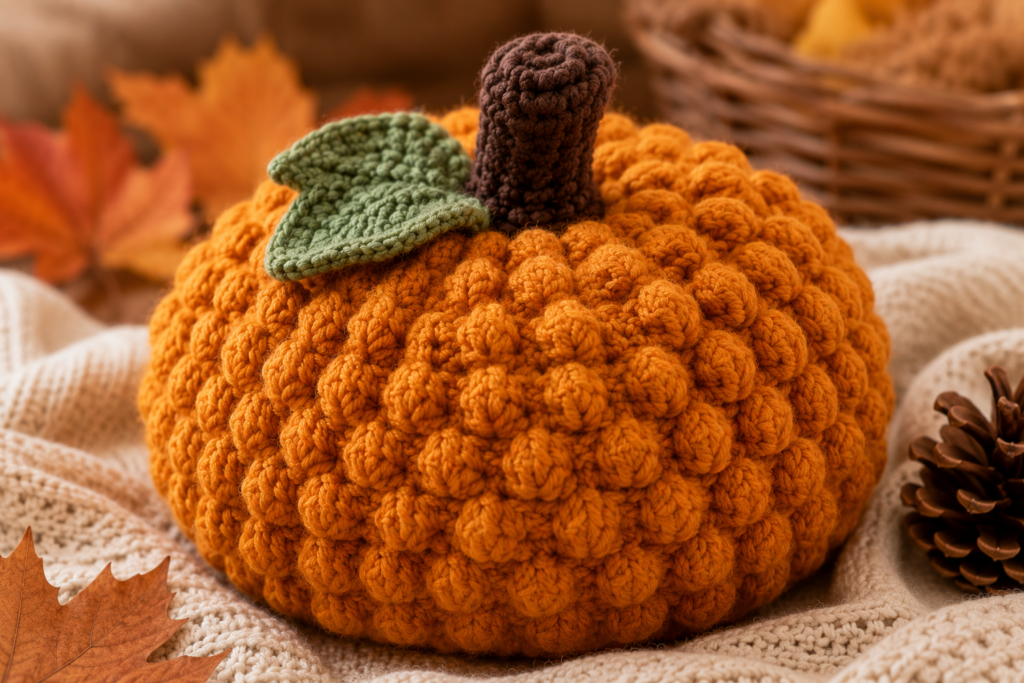
Skill level: Advanced beginner Finished size: Approximately 4–4.5 in. diameter, 3.5 in. tall Yarn: Worsted weight, approx. 55 yds Hook: 5mm (US H/8) Notions: Fiberfill, yarn needle, stitch marker
Special stitch — Bobble (MB): [Yarn over, insert hook in indicated st, yarn over, pull up a loop] 5 times in the same st (11 loops on hook). Yarn over, draw through all 11 loops on hook.
Body
- Rnd 1: 6 sc in MR. [6]
- Rnd 2: inc in each st around. [12]
- Rnd 3: (sc 1, inc) x 6. [18]
- Rnd 4: (sc 2, inc) x 6. [24]
- Rnd 5: (sc 3, inc) x 6. [30]
- Rnd 6 (Bobble rnd): (sc 4, MB in next st) x 6. [30]
- Rnd 7: sc even. [30]
- Rnd 8 (Bobble rnd, offset): (sc 1, MB in next st, sc 3) x 6. [30]
- Rnd 9: sc even. [30]
- Rnd 10 (Bobble rnd): (sc 4, MB in next st) x 6. [30]
- Rnd 11: (sc 3, dec) x 6. [24]
- Rnd 12: (sc 2, dec) x 6. [18] — begin stuffing
- Rnd 13: (sc 1, dec) x 6. [12]
- Rnd 14: dec x 6. [6]
Finish stuffing, fasten off, close top as in Pattern 1.
Stem
Work exactly as in Pattern 1 (6 sc in MR, sc even for 4 rnds) and sew to the top center.
Assembly & Finishing
The bobbles already create a raised, all-over texture, so segment lines are optional here — if you’d like them, run 2–3 light lines through the plain rounds between bobble columns rather than directly over the bobbles, which can flatten them. Weave in all ends.
10. Giant Crochet Pumpkin Free Pattern for Statement Décor
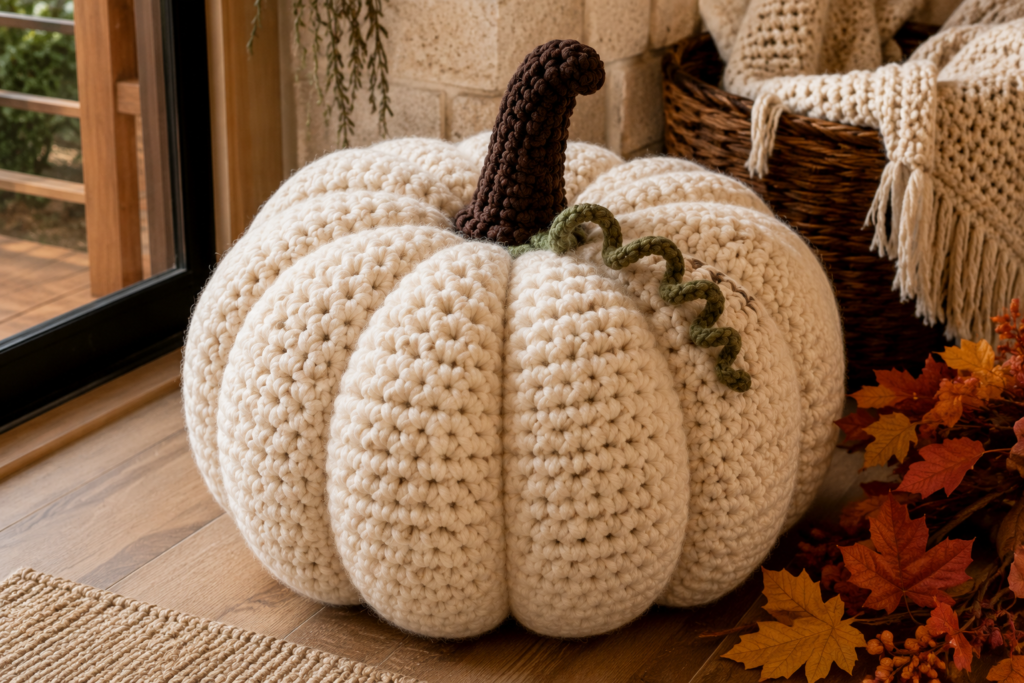
Skill level: Advanced beginner Finished size: Approximately 9–10 in. diameter, 8 in. tall Yarn: Super bulky (Category 6), or 2 strands of bulky held together throughout, approx. 300–350 yds main color Hook: 9mm (US M/13) Notions: A large bag of fiberfill (more than you think), yarn needle, stitch marker
Body
- Rnd 1: 6 sc in MR. [6]
- Rnd 2: inc in each st around. [12]
- Rnd 3: (sc 1, inc) x 6. [18]
- Rnd 4: (sc 2, inc) x 6. [24]
- Rnd 5: (sc 3, inc) x 6. [30]
- Rnd 6: (sc 4, inc) x 6. [36]
- Rnd 7: (sc 5, inc) x 6. [42]
- Rnd 8: (sc 6, inc) x 6. [48]
- Rnd 9: (sc 7, inc) x 6. [54]
- Rnd 10: (sc 8, inc) x 6. [60]
- Rnds 11–16: sc even (6 rnds). [60]
- Rnd 17: (sc 8, dec) x 6. [54]
- Rnd 18: (sc 7, dec) x 6. [48]
- Rnd 19: (sc 6, dec) x 6. [42] — begin stuffing
- Rnd 20: (sc 5, dec) x 6. [36]
- Rnd 21: (sc 4, dec) x 6. [30]
- Rnd 22: (sc 3, dec) x 6. [24]
- Rnd 23: (sc 2, dec) x 6. [18]
- Rnd 24: (sc 1, dec) x 6. [12]
- Rnd 25: dec x 6. [6]
Finish stuffing, fasten off, close top as in Pattern 1.
Stem
- Rnd 1: 8 sc in MR. [8]
- Rnds 2–8: sc even (7 rnds). [8]
Fasten off leaving a long tail; this wider, taller tube keeps the stem in proportion with the oversized body.
Assembly & Finishing
Stuff in stages, adding a layer of fiberfill, pressing it firmly and evenly against the sides, then adding more — this keeps a large pumpkin from ending up soft or lopsided in the middle, which is the most common problem at this scale. Add 6–8 segment lines as in Pattern 1, using a long doubled strand of yarn and pulling firmly (large stitches will absorb more tension than small ones). Sew the stem to the top center and weave in all ends.
A Note on Gauge
Finished sizes above assume an average amigurumi gauge — a snug fabric with no gaps between stitches, worked with a hook roughly one size smaller than the yarn label recommends. Your results may run slightly larger or smaller depending on your tension; this affects overall size but won’t affect whether the stitch counts and shaping work out, since those are based on repeats rather than exact gauge.