

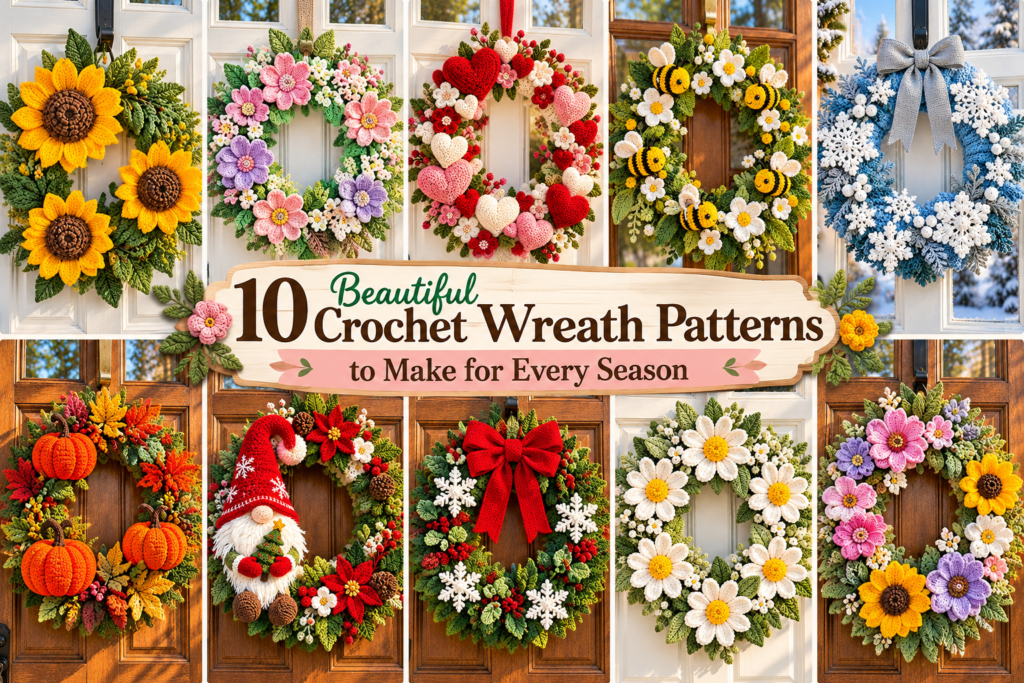
Crochet wreaths are one of my absolute favorite ways to add a warm, handmade touch to the home. They bring so much cozy character to a front door, gallery wall, or entryway. What I love most about working on a handmade crochet wreath is how wonderfully versatile it can be. By mastering one straightforward base, you can easily customize your creation with vibrant flowers, autumn leaves, mini pumpkins, or festive bows to celebrate every season of the year.
If you are looking for easy crochet wreath patterns that are relaxing to make yet look completely polished, this collection gives you ten beginner-friendly ideas to explore. We will use standard worsted-weight yarn, basic stitches, and simple amigurumi techniques so you can create stunning seasonal home décor with confidence.
🛍 Discover Our Best-Selling Patterns on Etsy!
BrightByteMarket — 6000+ Sales BrightByteCreatives — 2000+ SalesBasic Crochet Abbreviations
All patterns in this guide use standard US crochet terminology:
- ch: chain
- sc: single crochet
- hdc: half double crochet
- dc: double crochet
- sl st: slip stitch
- inc: increase (work 2 single crochet into the same stitch)
- dec: decrease (single crochet 2 stitches together)
- st / sts: stitch / stitches
- MR: magic ring
- FL / BL: front loop / back loop
What You’ll Need
Before starting any crochet wreath pattern, gather these essential tools and materials:
- Worsted-weight yarn (Medium / Category 4): Green for evergreen bases, plus seasonal accent colors.
- Crochet Hook: Size 4.0 mm (G-6) or 3.5 mm (E-4) depending on the project details.
- Polyester Fiberfill Stuffing: For shaping the wreath tube and dimensional accents.
- Tapestry Needle & Scissors: For weaving ends and assembling motifs.
- Stitch Marker: Essential for tracking continuous spiral rounds.
- Decorative Ribbons: Satin or burlap ribbon for hanging loops and bows.
- Optional Materials: 10-inch styrofoam wreath form (if opting against a stuffed tube) and PVA liquid craft glue for stiffening snowflakes.
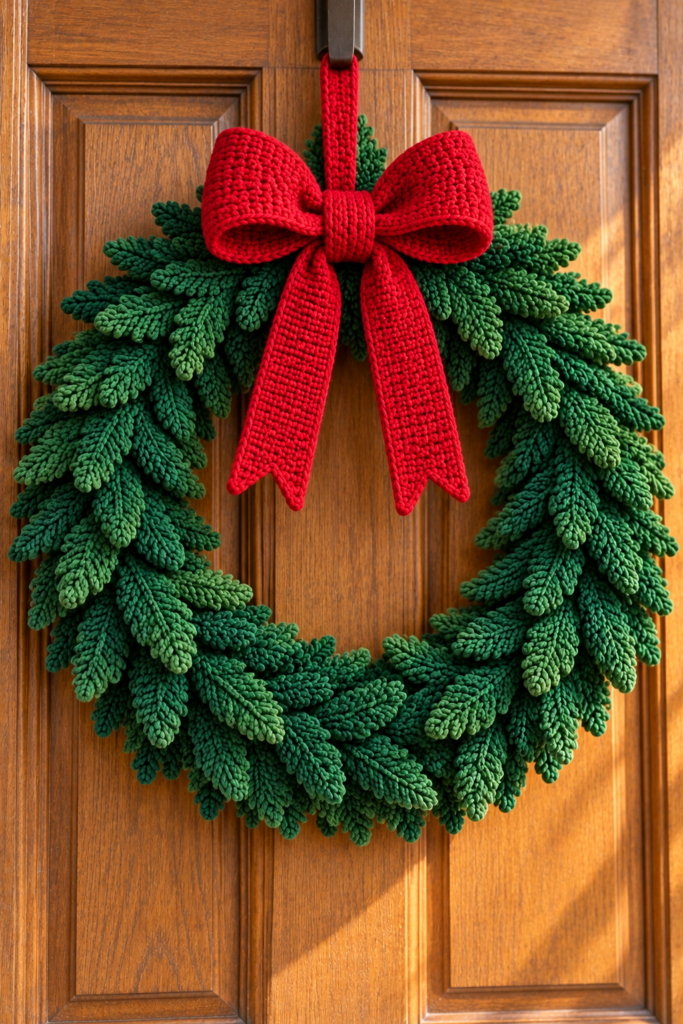
1. Classic Evergreen Crochet Wreath
This classic evergreen wreath serves as the foundational design for almost every seasonal project. We construct this base as a hollow, stuffed crochet tube worked in continuous spiral rounds, then sew the ends together to form a seamless ring.
                  ======================================
                 (  STUFFED CROCHET TUBE WITH FIBERFILL )
                  ======================================
                                     ||
                                     \/  (Bend & Join Ends)
                                 .---''---.
                                /          \
                               |     O      |  <-- Ring Opening
                                \          /
                                 '---..--'
Materials
- Worsted-weight yarn in dark green (approx. 200 yards)
- 4.0 mm crochet hook
- Polyester fiberfill
- Tapestry needle & scissors
- 1.5-inch red decorative ribbon
Wreath Base Pattern
- Foundation: Ch 24. Join with a sl st to the first chain to form a circle, making sure the chain is not twisted.
- Round 1: Sc in each of the 24 ch around. Do not join at the end of the round. (24 sts)
- Rounds 2–110 (or desired length): Work in continuous spiral rounds without joining. Sc in each st around. Place a stitch marker in the first stitch of Round 2 and move it up each round. (24 sts per round)
Pro Tip: Add small handfuls of fiberfill into the tube every 10–12 rounds as you go. Stuff firmly enough to hold a smooth cylinder shape, but leave enough flexibility so the tube bends into a neat circle without overstretching the stitches.
Assembly & Finishing
- Continue crocheting until your tube measures approximately 16–18 inches (40–46 cm), which may require more or fewer rounds depending on your individual tension.
- Fasten off, leaving an 18-inch yarn tail.
- Bend the stuffed tube into a ring, aligning the open end with the foundation chain edge.
- Using a tapestry needle and the long yarn tail, whipstitch the open end to the foundation chain edge stitch-by-stitch (24 stitches total).
- Weave in ends securely. Tie your decorative ribbon around the seam to form a hanging loop and bow. Finished size is approximately 10–12 inches (25–30 cm) in overall diameter.
Beginner Tip: Working in continuous spiral rounds prevents a visible diagonal seam along the outside of your wreath base.
🛍 Discover Our Best-Selling Patterns on Etsy!
BrightByteMarket — 6000+ Sales BrightByteCreatives — 2000+ Sales2. Crochet Sunflower Wreath
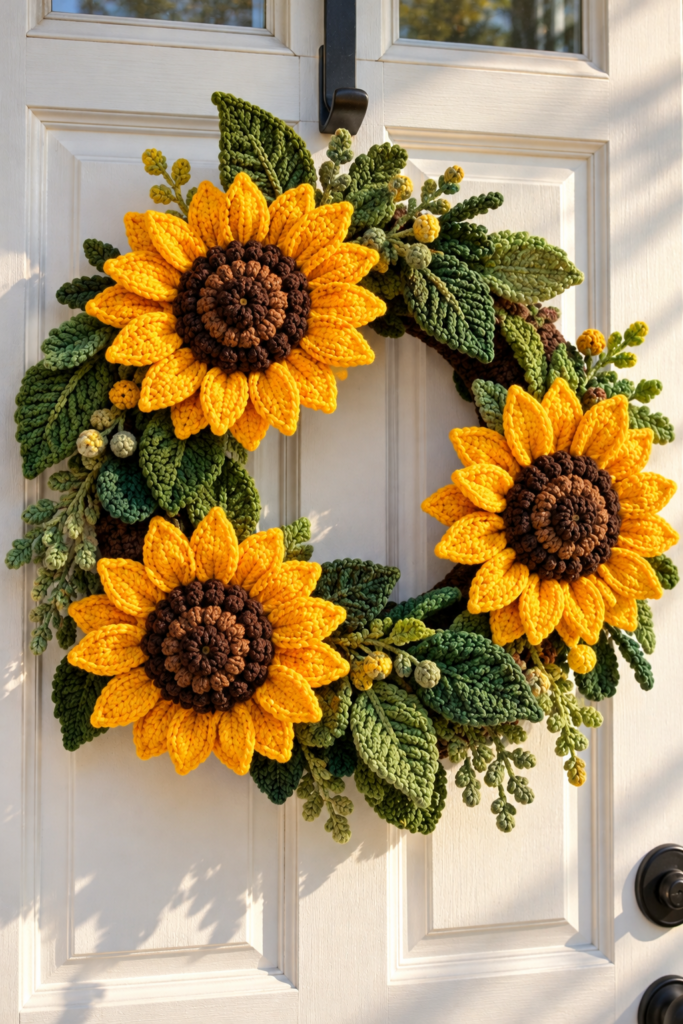
Bright yellow petals combined with textured brown centers make a crochet sunflower wreath a vibrant choice for summer and early fall.
Materials
- Worsted yarn in dark brown, golden yellow, and dark green
- 4.0 mm crochet hook
- Classic Evergreen Wreath Base (Pattern #1)
Sunflower Head Pattern (Make 3)
Center (Brown Yarn):
- Round 1: Work 6 sc into MR. (6 sts)
- Round 2: Inc in each st around. (12 sts)
- Round 3: (Sc in next st, inc) 6 times. (18 sts)
- Round 4: (Sc in next 2 sts, inc) 6 times. (24 sts)
- Fasten off brown yarn.
Petals (Yellow Yarn):
Join yellow yarn to the front loop of any Round 4 stitch.
- Petal Repeat: Ch 6. Starting in the 2nd ch from hook, work 1 sl st, 1 sc, 1 hdc, 1 dc, 1 dc along the chain. Skip the next front loop on the center disc, then sl st into the following front loop.
- Repeat this process around the disc to create exactly 12 petals from the 24 front loops. Fasten off, leaving a 12-inch tail.
Assembly & Finishing
Arrange the three sunflower heads along the lower left arc of your wreath base. Sew each flower securely to the wreath using the yarn tail, passing your needle through the back loops of the flower center directly into the wreath tube stitches. Add two flat crocheted leaf accents (Ch 8, sc in 2nd ch, hdc in next, dc in next 3, hdc, sc) behind the flowers.
Beginner Tip: Skipping one front loop between petal attachments allows all 12 petals to lie flat without crowding or curling.
🛍 Discover Our Best-Selling Patterns on Etsy!
BrightByteMarket — 6000+ Sales BrightByteCreatives — 2000+ Sales3. Crochet Floral Spring Wreath
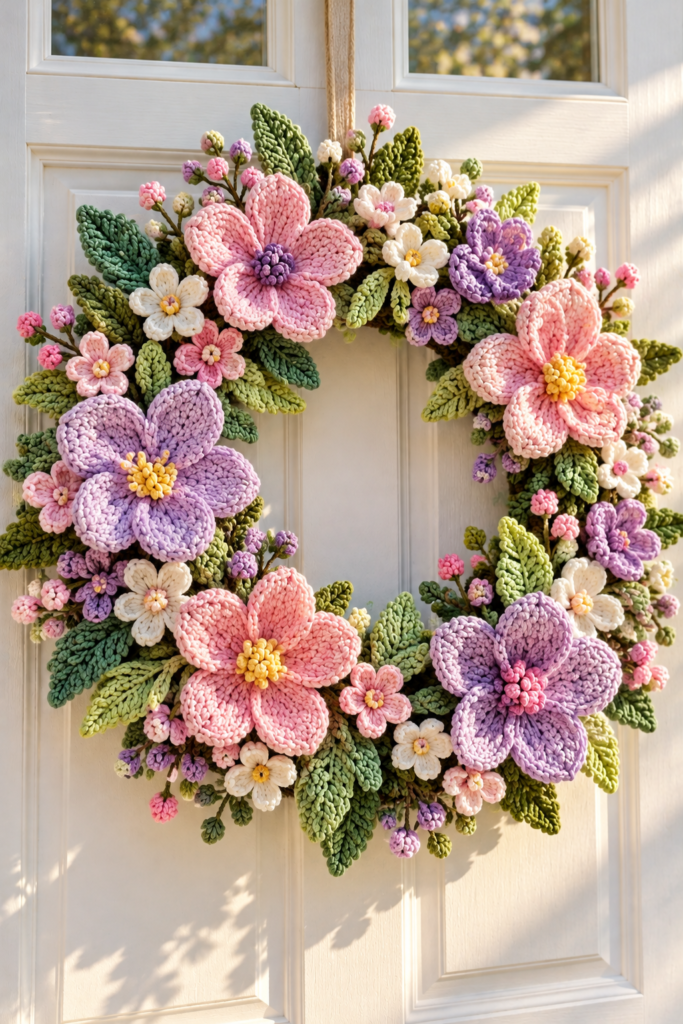
Delicate pastels and tiny blossoms make a crochet spring wreath ideal for Easter, Mother’s Day, or welcoming warmer weather.
Materials
- Worsted yarn in soft green (for base), pastel pink, soft yellow, and lavender
- 3.5 mm crochet hook
- Wreath Base (Pattern #1, using soft green yarn)
Small Spring Flower Pattern (Make 8)
- Round 1 (Yellow Center): Work 5 sc into MR. Sl st to first sc. Fasten off yellow yarn. (5 sts)
- Round 2 (Petals – Pink or Lavender): Join petal yarn in any st. (Sl st, ch 2, 2 dc, ch 2, sl st) into the same st, then sl st into the next st. Repeat from * around to create 5 rounded petals across the 5 center stitches. Fasten off, leaving an 8-inch tail.
Assembly & Finishing
Cluster the small pastel flowers in groups of three and five along the lower right curve of the wreath base. Sew each flower securely to the front of the wreath using its yarn tail, weaving the needle through the center ring of the flower into the wreath body.
Beginner Tip: Keep yarn tails on the back of each flower until final placement so you can re-arrange color patterns before sewing.
🛍 Discover Our Best-Selling Patterns on Etsy!
BrightByteMarket — 6000+ Sales BrightByteCreatives — 2000+ Sales4. Crochet Christmas Wreath
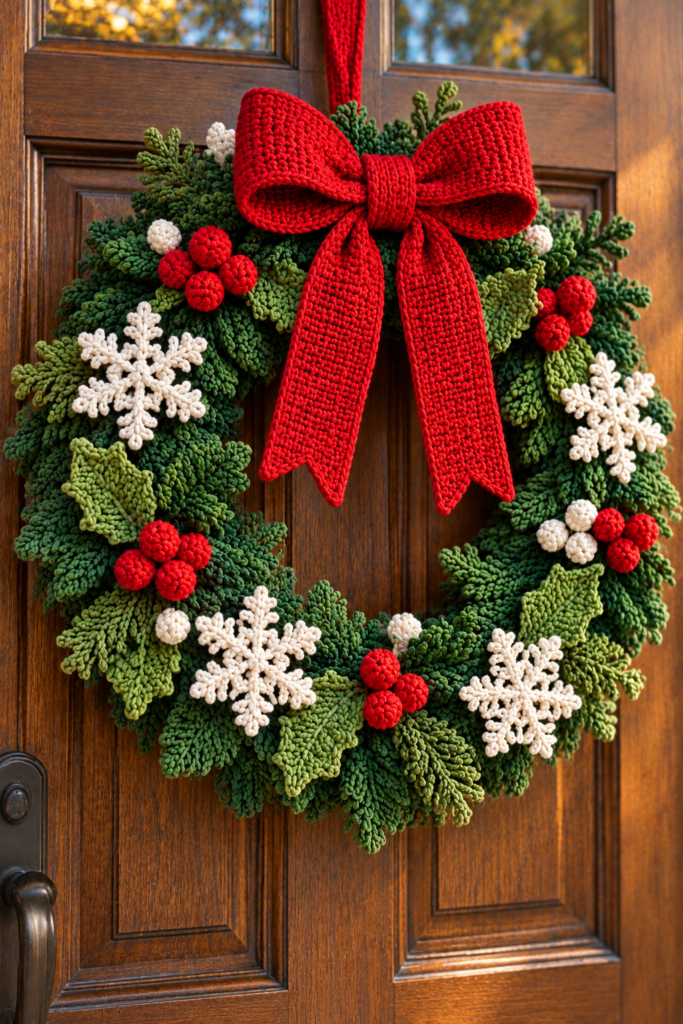
A festive holiday design featuring rich green yarn, bright red berries, and white snowflake accents makes a wonderful handmade crochet Christmas wreath.
Materials
- Worsted yarn in dark green, bright red, and white
- 4.0 mm crochet hook
- Classic Evergreen Wreath Base (Pattern #1)
Red Berries Pattern (Make 5)
- Round 1 (Red Yarn): Work 6 sc into MR. (6 sts)
- Round 2: Sc in each st around. (6 sts)
- Stuff a tiny scrap of red yarn inside the berry cavity.
- Fasten off, leaving an 8-inch tail. Thread the tail through the front loops of Round 2 with a tapestry needle, pull firmly to close the sphere, and knot securely.
White Snowflake Accent Pattern (Make 3)
- Round 1 (White Yarn): Work 6 sc into MR. Sl st to first sc. (6 sts)
- Round 2:(Ch 4, sl st in 2nd ch from hook, sc in next 2 ch, sl st into next st of MR) 6 times. (6 star points) Fasten off.
Assembly & Finishing
Position 5 red berries in a tight cluster near the top center of the wreath. Flank the berries with 3 white snowflake accents. Sew each item flat to the green wreath body using matching yarn tails.
Beginner Tip: Adding a tiny yarn scrap inside small amigurumi berries keeps them perfectly round without clumping fiberfill.
🛍 Discover Our Best-Selling Patterns on Etsy!
BrightByteMarket — 6000+ Sales BrightByteCreatives — 2000+ Sales5. Crochet Pumpkin Fall Wreath
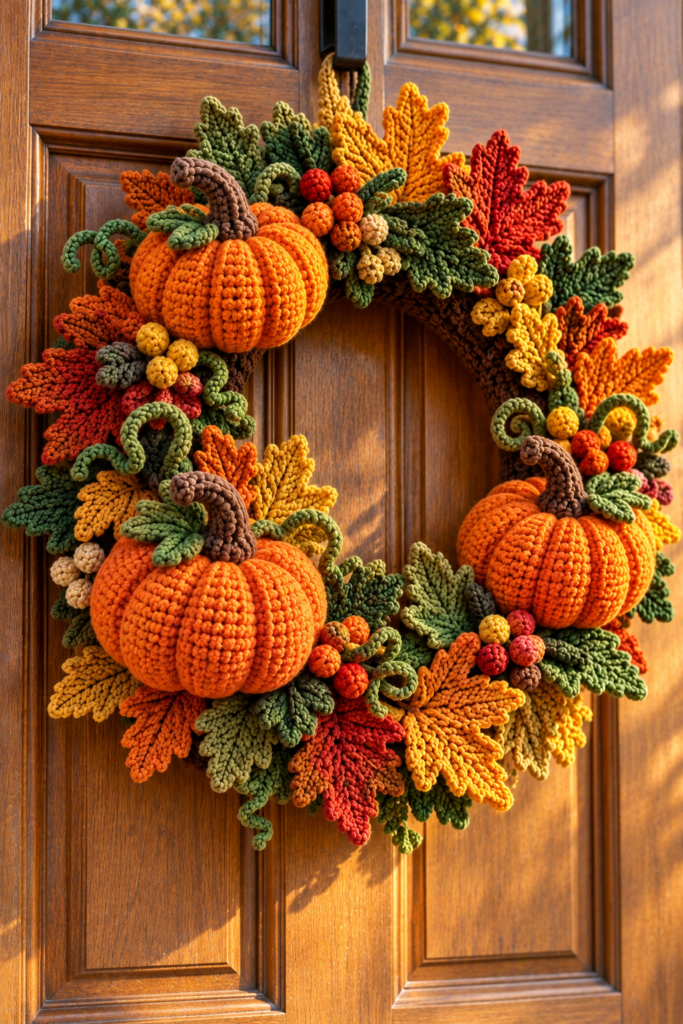
Celebrate autumn with rich terracotta and burnt orange shades using this cozy crochet fall wreath design decorated with mini stuffed pumpkins.
Mini Pumpkin Pattern (Make 3)
- Round 1 (Orange Yarn): Work 6 sc into MR. (6 sts)
- Round 2: Inc in each st around. (12 sts)
- Round 3: (Sc in next st, inc) 6 times. (18 sts)
- Rounds 4–7: Sc in each st around. (18 sts for 4 rounds)
- Round 8: (Sc in next st, dec) 6 times. (12 sts)
- Stuff the body firmly with fiberfill.
- Round 9: Dec 6 times. (6 sts) Fasten off, leaving an 18-inch yarn tail.
     Yarn wrapped around outer walls
         to pull down ridges
             .---.
           /   |   \
          |    |    |   <-- Creates 6 distinct
           \   |   /        pumpkin segments
             '---'
Shaping the Pumpkin
- Thread the 18-inch tail onto a tapestry needle.
- Insert needle up through the bottom center and out the top center. Pull yarn down along the outside wall and re-insert into the bottom center.
- Pull taut to compress the side and create a groove. Repeat 5 more times evenly around the sphere to form 6 distinct pumpkin segments.
- Stem: With brown yarn, ch 4. Sc in 2nd ch from hook and in next 2 ch. Sew stem to top center.
Assembly & Finishing
Place the three mini pumpkins along the bottom center of an olive green or brown wreath base. Sew each pumpkin through its base stitches into the wreath tube.
Beginner Tip: Pulling the shaping tail firmly creates deep, realistic grooves in your mini pumpkins.
🛍 Discover Our Best-Selling Patterns on Etsy!
BrightByteMarket — 6000+ Sales BrightByteCreatives — 2000+ Sales6. Crochet Bee and Flower Wreath
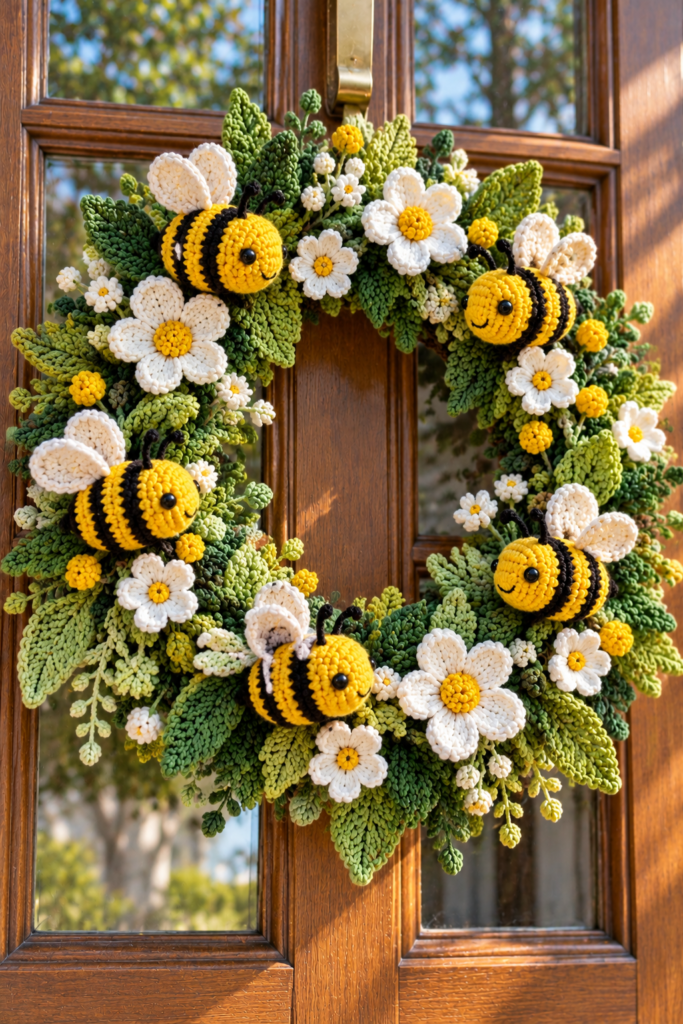
Featuring charming yellow-and-black stripes and tiny wings, this playful design works wonderfully for nurseries or summer doors.
Mini Bee Pattern (Make 2)
- Round 1 (Yellow Yarn): Work 6 sc into MR. (6 sts)
- Round 2: Inc in each st around. (12 sts)
- Round 3 (Black Yarn): Sc in each st around. (12 sts)
- Round 4 (Black Yarn): Sc in each st around. (12 sts)
- Round 5 (Yellow Yarn): Sc in each st around. (12 sts)
- Round 6 (Yellow Yarn): Sc in each st around. (12 sts)
- Stuff the bee body lightly with fiberfill.
- Round 7 (Black Yarn): Dec 6 times. (6 sts) Fasten off, thread tail through front loops, pull tight to close, and weave in ends.
Bee Wings (White Yarn)
Join white yarn to the top center seam of the bee’s body. (Ch 3, 2 dc, ch 3, sl st into same space) twice to create two wing loops. Fasten off.
Assembly & Finishing
Position two bees hovering near three simple white flower blooms (using Pattern #3 in white yarn) along the upper right side of your wreath base. Sew securely using white yarn tails passed into the wreath base.
Beginner Tip: Carry yarn colors neatly along the inside of the bee body during color changes to keep your work clean.
🛍 Discover Our Best-Selling Patterns on Etsy!
BrightByteMarket — 6000+ Sales BrightByteCreatives — 2000+ Sales7. Crochet Heart Wreath
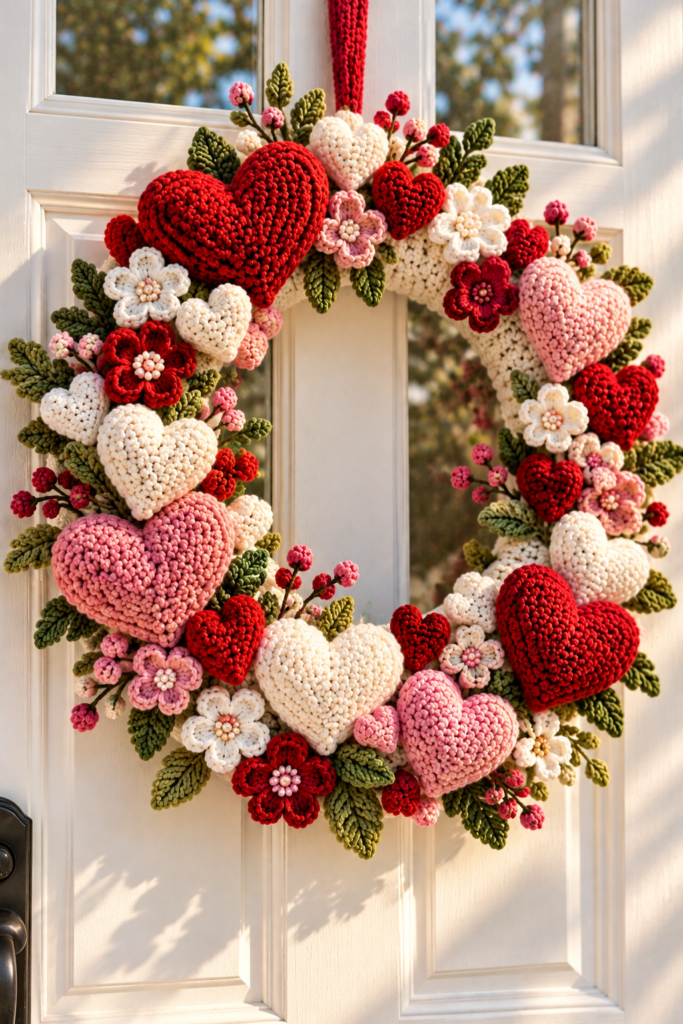
Ideal for Valentine’s Day or wedding gifts, this heart wreath pattern features dimensional amigurumi hearts arranged on a cream background.
       Lobe 1            Lobe 2
      (12 sts)          (12 sts)
      .------.          .------.
     /        \        /        \
    |          |======|          |  <-- Join Lobes together
     \        /  Join  \        /       (24 sts total)
      '------'          '------'
           \              /
            \            /
             \          /  <-- Decrease gradually down
              \        /       to form bottom point
               '------'
Stuffed Heart Accent Pattern (Make 3)
Lobe 1:
- Round 1 (Red or Pink): Work 6 sc into MR. (6 sts)
- Round 2: Inc in each st around. (12 sts)
- Round 3: Sc in each st around. (12 sts)
- Fasten off Lobe 1, leaving a 6-inch yarn tail.
Lobe 2 & Joining:
- Rounds 1–3: Work identically to Lobe 1, but do not fasten off.
- Round 4 (Joining Round): Sc across all 12 sts of Lobe 1, then sc across all 12 sts of Lobe 2. (24 sts total around outer perimeter)
- Note: Use the 6-inch tail from Lobe 1 to stitch closed any tiny gap between the two lobes at the center valley.
- Round 5: Sc in each st around. (24 sts)
- Round 6: (Sc in next 2 sts, dec) 6 times. (18 sts)
- Round 7: Sc in each st around. (18 sts)
- Stuff the upper lobes lightly with fiberfill.
- Round 8: (Sc in next st, dec) 6 times. (12 sts)
- Round 9: Sc in each st around. (12 sts)
- Round 10: Dec 6 times. (6 sts)
- Fasten off, thread tail through front loops, pull tight to form a sharp bottom point, and knot securely.
Assembly & Finishing
Space three stuffed hearts along the lower arc of a cream crochet wreath base. Sew each heart in place by running yarn stitches through the back surface of the heart into the wreath.
Beginner Tip: Stuffing the upper lobes before starting Round 8 makes shaping much easier.
🛍 Discover Our Best-Selling Patterns on Etsy!
BrightByteMarket — 6000+ Sales BrightByteCreatives — 2000+ Sales8. Crochet Daisy Wreath
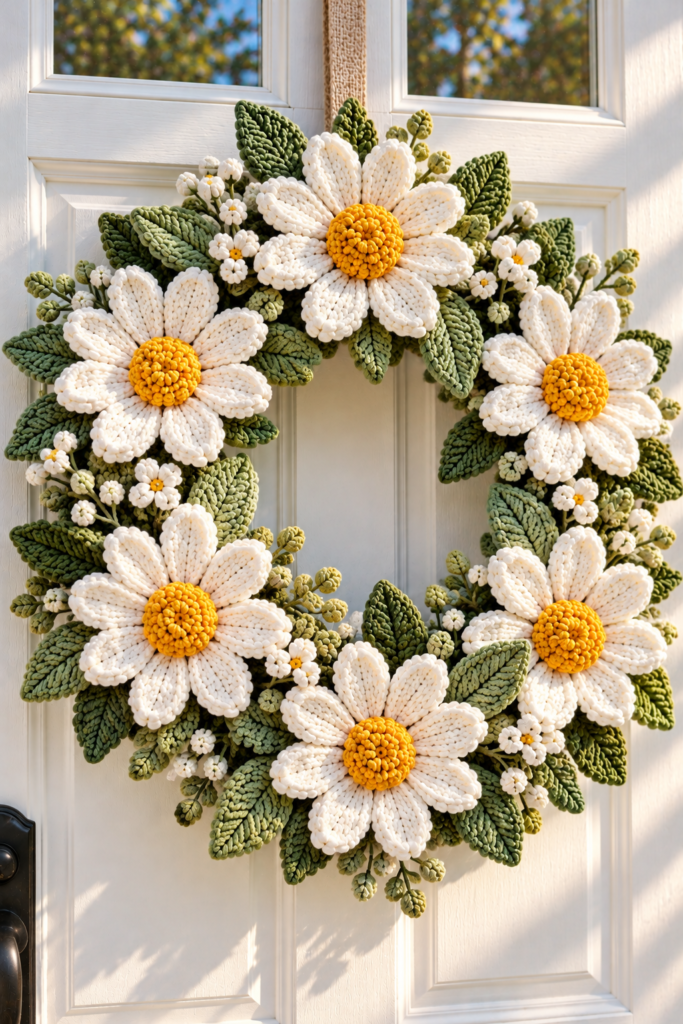
Crisp white petals around bright yellow centers create a fresh cottagecore look for late spring and summer.
Daisy Pattern (Make 6)
- Round 1 (Yellow Center): Work 6 sc into MR. Sl st to first sc to join. (6 sts)
- Round 2 (White Petals): Join white yarn in the first stitch.
- Petal Step: Ch 5. Starting in 2nd ch from hook, work 1 sl st, 1 sc, 1 hdc, 1 dc along chain, then sl st into the same center st.
- Sl st into the next stitch of Round 1.
- Repeat * Petal Step 5 more times to create 6 distinct, pointed petals around the center. Fasten off, leaving an 8-inch tail.
Assembly & Finishing
Distribute six daisies evenly around a sage green wreath base. Sew each flower securely through its yellow center directly into the wreath tube stitches.
Beginner Tip: Moving to the next center stitch with a slip stitch keeps all six petals evenly spaced around the ring.
🛍 Discover Our Best-Selling Patterns on Etsy!
BrightByteMarket — 6000+ Sales BrightByteCreatives — 2000+ Sales9. Crochet Snowflake Winter Wreath
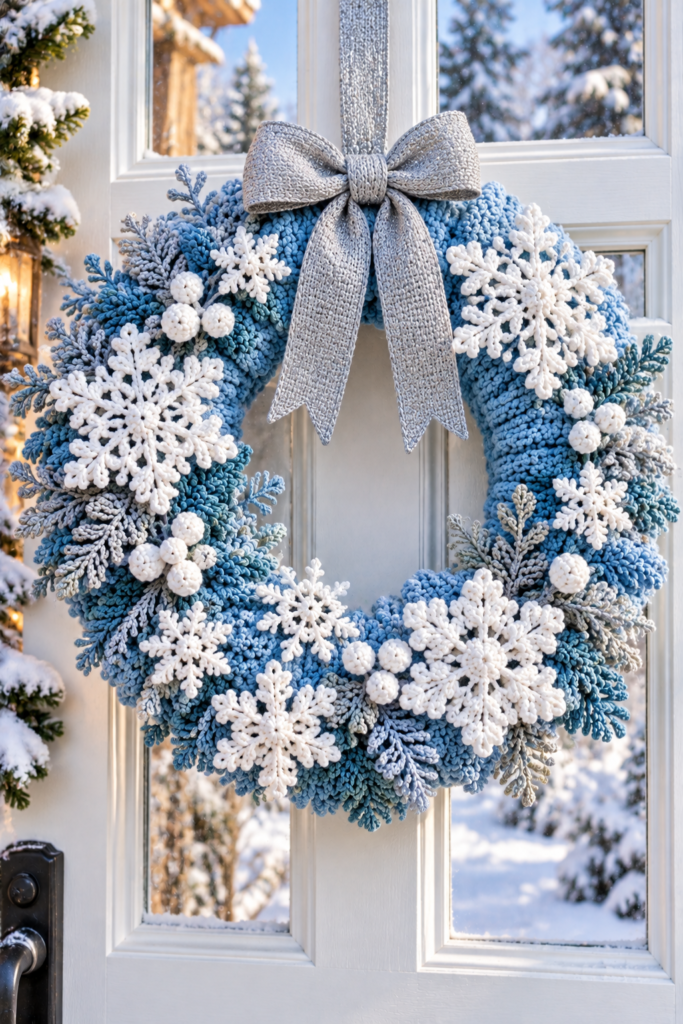
This winter crochet wreath uses delicate snowflake motifs stiffened with craft glue for an icy seasonal touch.
Snowflake Motif Pattern (Make 4)
- Round 1 (White Yarn): Work 6 sc into MR. Sl st to first sc. (6 sts)
- Round 2:(Ch 5, sl st into next st of Round 1) 6 times. (6 ch-5 loops)
- Round 3: In each ch-5 loop, work: (2 sc, ch 3, sl st in 3rd ch from hook for picot point, 2 sc). Sl st into the original stitch of Round 1 between loops. Repeat 5 more times around. Fasten off white yarn.
Stiffening Instructions: Mix equal parts water-based white liquid glue and warm water in a small bowl. Submerge snowflakes, squeeze out excess liquid, and pin flat onto a blocking board into star shapes. Allow to dry completely for 24 hours before handling or attaching to your project.
Assembly & Finishing
Stitch the dry, rigid snowflakes flat onto a sky-blue wreath base using white sewing thread or thin yarn tails.
Safety & Handling Note: Always verify that stiffened snowflakes are completely dry to the touch before attaching them to yarn to prevent moisture stains.
🛍 Discover Our Best-Selling Patterns on Etsy!
BrightByteMarket — 6000+ Sales BrightByteCreatives — 2000+ Sales10. Crochet Gnome Holiday Wreath
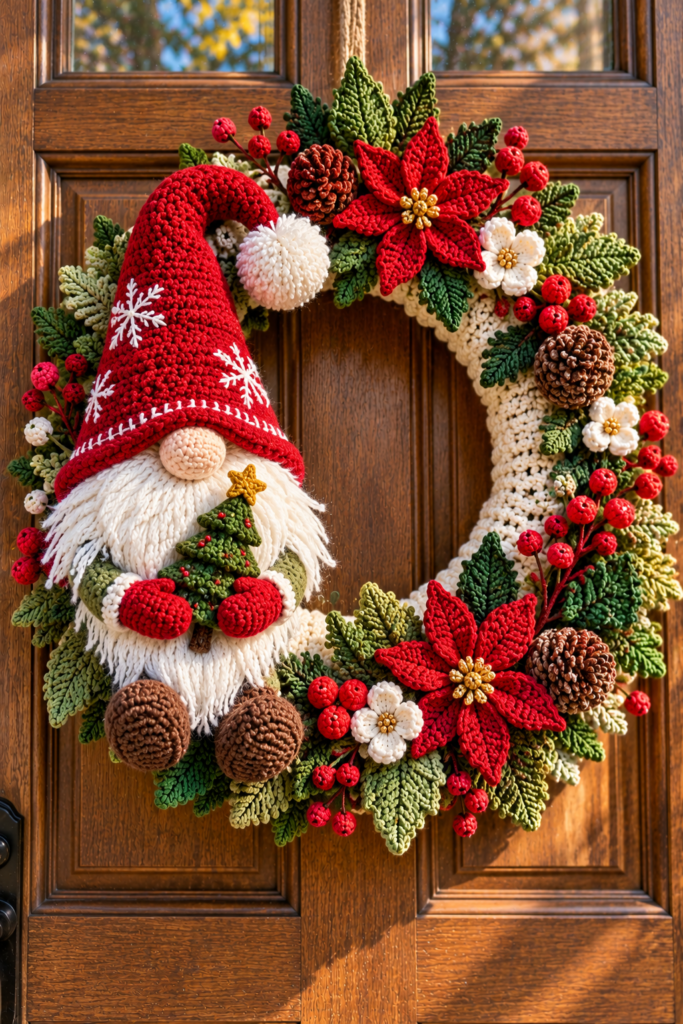
A whimsical amigurumi gnome sitting inside a winter wreath adds a cozy, cheerful element to holiday entryway décor.
Mini Gnome Pattern
Body & Head:
- Round 1 (Red Yarn): Work 6 sc into MR. (6 sts)
- Round 2: Inc in each st around. (12 sts)
- Rounds 3–6: Sc in each st around. (12 sts for 4 rounds)
- Stuff body firmly with fiberfill.
- Round 7: Dec 6 times. (6 sts) Fasten off and weave end closed.
Tall Floppy Hat:
- Round 1 (Red Yarn): Work 4 sc into MR. (4 sts)
- Round 2: (Sc in next st, inc) 2 times. (6 sts)
- Round 3: Sc in each st around. (6 sts)
- Round 4: (Sc in next 2 sts, inc) 2 times. (8 sts)
- Round 5: Sc in each st around. (8 sts)
- Round 6: (Sc in next st, inc) 4 times. (12 sts)
- Round 7: (Sc in next 2 sts, inc) 4 times. (16 sts)
- Rounds 8–10: Sc in each st around. (16 sts for 3 rounds) Fasten off, leaving a 12-inch tail.
Nose & Beard:
- Nose: Work 5 sc into MR using beige yarn. Sl st to join, fasten off.
- Beard: Attach 3-inch pieces of white acrylic yarn to the body below the nose location using a latch-hook fringe technique. Gently comb with a wire brush for a fluffy beard texture.
Assembly & Finishing
Fit the floppy red hat over the top of the body/head block and sew around the rim using your yarn tail. Position the assembled gnome sitting inside the lower inner curve of a deep green wreath base and stitch securely in place through the back of the hat and body.
Beginner Tip: Expanding the hat to 16 stitches gives it a loose fit that easily slips over the body top.
🛍 Discover Our Best-Selling Patterns on Etsy!
BrightByteMarket — 6000+ Sales BrightByteCreatives — 2000+ SalesTips for Making Crochet Wreaths
- Choosing Base Options: If you prefer not to stuff a long tube, buy a 10-inch styrofoam ring. Crochet a flat rectangle (e.g., Row 1: Ch 22, Rows 2–110: Sc across), wrap it around the form, and whipstitch the long seam together along the back side.
- Securing Embellishments: For outdoor wreaths exposed to weather, sew embellishments on with matching yarn and a tapestry needle. For indoor decorative displays, hot glue works well for quick assembly.
- Preventing Sagging: Insert a thin wire or plastic ring inside the top section of your stuffed tube before sewing the ends together to provide structural support for hanging.
Final Thoughts
Making a handmade crochet wreath is such a rewarding project because it blends basic stitches with endless creative freedom. Whether you begin with a simple evergreen design or jump right into seasonal pumpkins, sunflowers, or snowflakes, these patterns offer a wonderful starting point for decorating your space year-round.
Happy crocheting, and enjoy creating cozy, handmade décor for every season!