
Looking for a quick and creative crochet project for your home or garden? This Crochet Wind Spinner Pattern is a simple project that creates a beautiful spiral decoration when finished. It uses basic crochet stitches and only a few supplies, making it a fun project for crocheters who want to make something decorative without a complicated pattern.
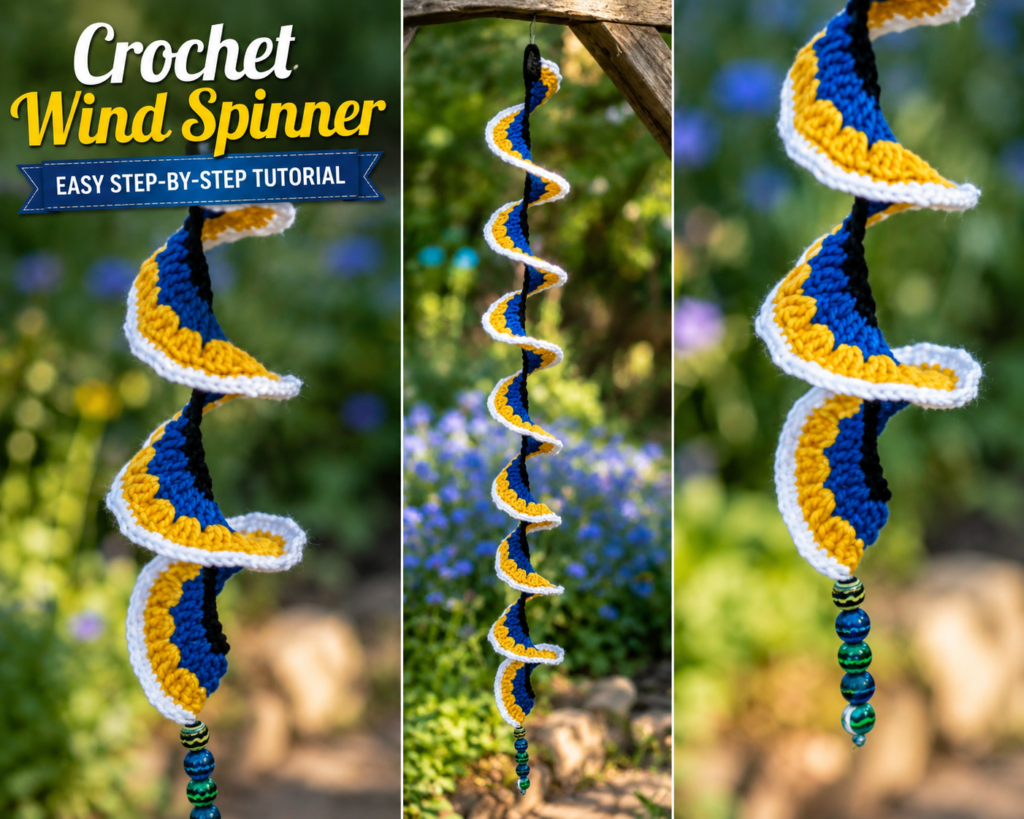
The finished crochet wind spinner is approximately 20 inches (50 cm) long, although you can customize the starting chain to make your spinner shorter or longer.
Materials Needed for the Crochet Wind Spinner
Before starting your crochet wind spinner, gather the following materials:
- Light cotton yarn – US Light / UK Light Worsted / approximately 125 m per 50 g
- Crochet hook – B (US) / 12 (UK) / 2.5 mm (EU)
- Scissors
- Sewing needle
- Stitch marker
- Craft beads, if desired
You can use cotton yarn in different colors to create your own color combination. The original pattern gives examples such as gründl Cotton Quick uni or GB Wool Carina.
Finished Size
The completed crochet wind spinner pattern measures approximately:
20 inches / 50 cm long
The length can easily be customized because the starting chain does not have to be exactly the same length. You can make the foundation chain longer or shorter depending on the size you want.
Crochet Abbreviations
This pattern uses US crochet terminology:
- rnd = round
- st = stitch
- ch = chain
- tch = turning chain
- sc = single crochet
- sl st = slip stitch
- dc = double crochet
If you are comfortable with these basic stitches, you can work through this crochet wind spinner pattern without needing complicated techniques.
How to Crochet a Wind Spinner
Step 1: Create the Starting Chain
The first step determines the overall length of your wind spinner.
Note: You can make the starting chain space as long as you like. Simply add more or fewer chain stitches depending on the desired finished length.
Row 1
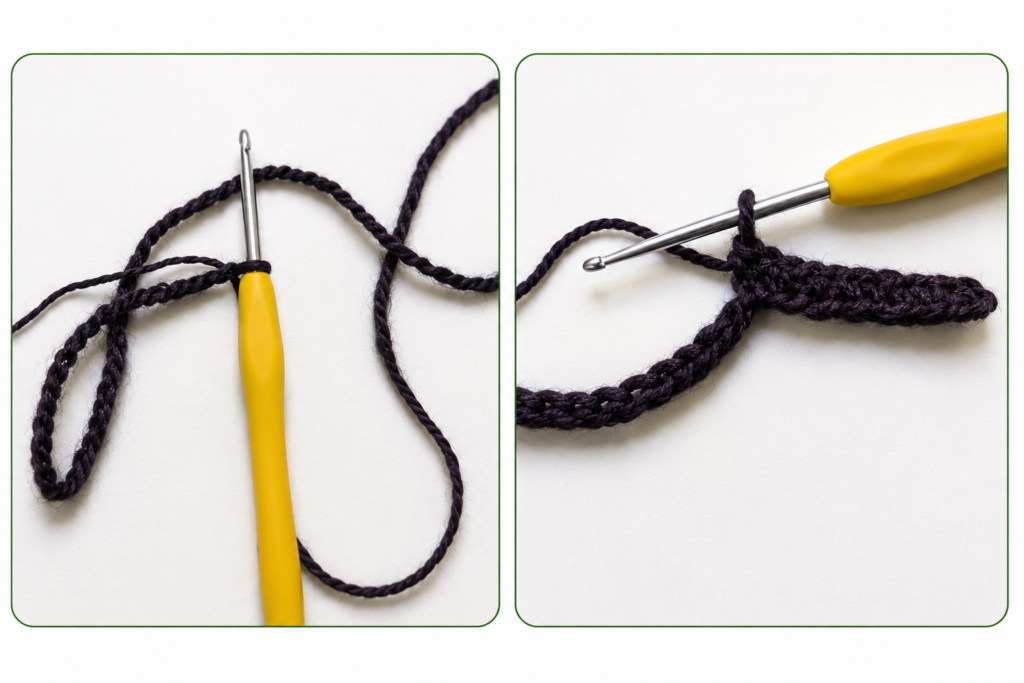
Start by chaining 121 stitches.
Skip the first stitch and work single crochet stitches back along the chain.
Count 20 stitches, then make a slip stitch.
This creates the first section of the foundation and begins the structure that will eventually curl into the wind spinner shape.
After completing Row 1, change to your next yarn color.
Step 2: Add the Double Crochet Increases
Row 2
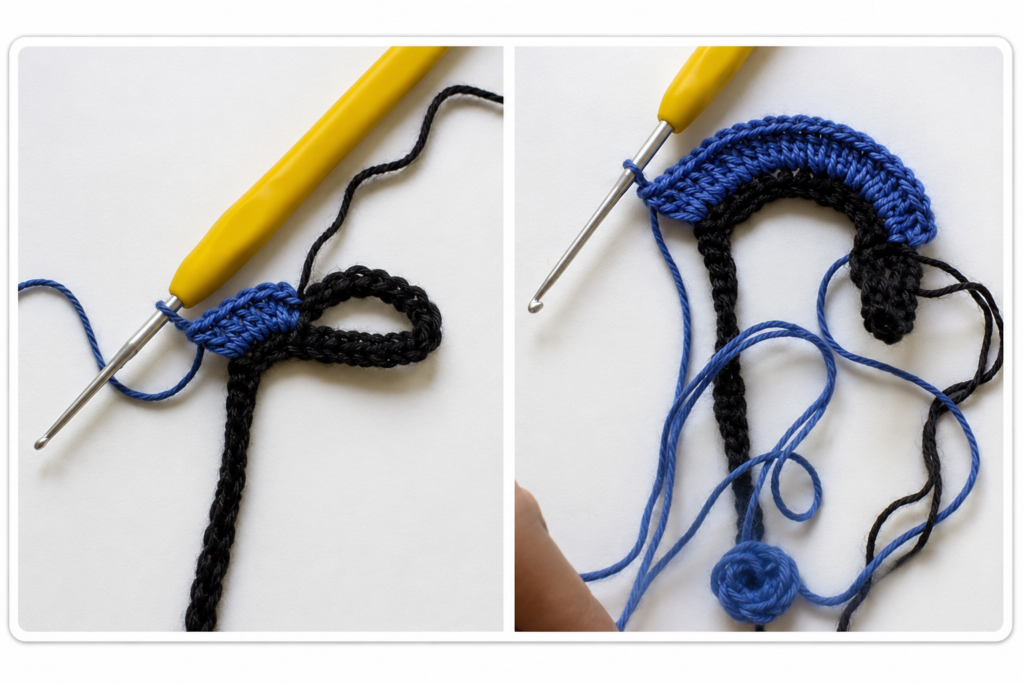
Chain 1 to begin the row.
Work 2 double crochet stitches into every stitch across the row.
This increase in every stitch is what begins creating the fullness needed for the spiral effect.
Once you reach the end of the row, cut the yarn.
Change to another color before starting the next row.
Step 3: Create the Spiral Shape
Row 3
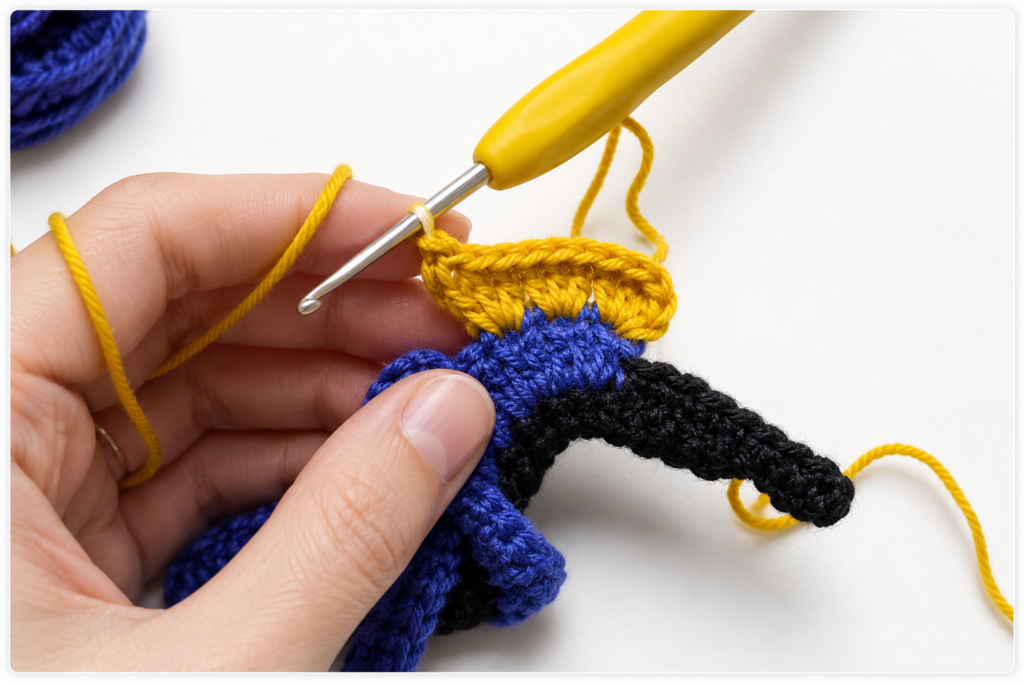
Chain 1.
Work 3 double crochet stitches into one stitch.
Skip the next stitch.
Continue repeating:
3 dc into one stitch, skip 1 stitch
Work this sequence all the way to the end of the row.
If you have one stitch remaining at the end, work 1 additional double crochet into that stitch.
Cut the yarn and change color again.
This row is particularly important because the combination of multiple double crochet stitches and skipped stitches creates the shaping that allows the finished piece to curl and form the characteristic wind-spinner spiral.
Step 4: Finish the Edge
Row 4
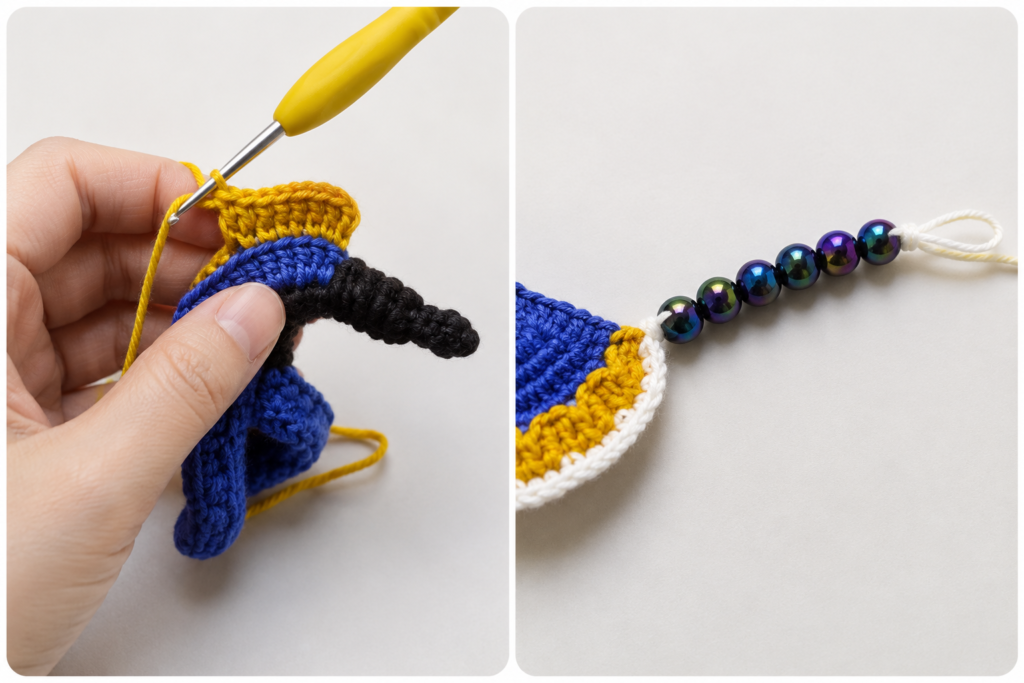
Chain 1.
Work 1 single crochet into each of the first two stitches.
Then work 2 single crochet stitches into the next stitch.
Continue repeating this sequence across the entire row:
1 sc, 1 sc, 2 sc
Continue until you reach the end.
Cut the yarn after completing the row.
This final increase row gives the wind spinner its finished decorative edge and helps enhance the spiral shape.
Finishing the Crochet Wind Spinner
Once all four rows are complete, weave in all the loose yarn ends using a sewing or yarn needle.
Take your time securing the ends neatly so that the finished decoration looks clean from every angle.
For an additional decorative touch, you can thread craft beads onto the bottom of the wind spinner. The beads add weight and movement, allowing the finished piece to hang beautifully.
After the ends are woven in and the beads are added, your Crochet Wind Spinner Pattern is complete!
How to Customize Your Crochet Wind Spinner
One of the best things about this project is how easy it is to customize. The pattern specifically allows you to change the length by adjusting the number of starting chains.
You can also experiment with different cotton yarn colors. Changing colors between rows creates attractive stripes and makes the spiral more eye-catching.
For a more personalized decoration, try coordinating the yarn colors with your garden, balcony, porch, craft room, or outdoor space.
Crochet Wind Spinner Pattern Tips
Keep your stitches consistent while working across each row. Since the project relies on increases and skipped stitches to create its shape, following the stitch sequence carefully will help produce the intended spiral effect.
A stitch marker can also be useful for keeping track of your work, especially if you are making a longer starting chain.
When finished, gently arrange the spiral instead of pulling it aggressively. This will help reveal the decorative shape created by the increases.
Final Thoughts
This Crochet Wind Spinner Pattern is a simple and enjoyable way to turn basic crochet stitches into a charming hanging decoration. With only four main rows, cotton yarn, and a 2.5 mm crochet hook, you can create a colorful spinner measuring approximately 20 inches long.
The ability to customize the starting chain and yarn colors also makes this a versatile project. Add beads to the bottom for extra movement, choose your favorite color combination, and enjoy making a handmade decoration for your home or garden.