
Introduction
The first wind spinner I ever crocheted hung crooked, spun about as gracefully as a broken ceiling fan, and unraveled at the tip within a week. I still hung it on my porch anyway, because even a wobbly, lopsided spiral of yarn catching the afternoon light felt like a small miracle.
That was four wind spinners ago. Since then I’ve made them as porch decor, as gifts for my mother-in-law’s garden, and as one of the best-selling items in my little Etsy shop during spring and summer. Along the way I’ve made just about every mistake you can make with a wind spinner crochet pattern — under-blocked spirals that went limp in the rain, yarn choices that faded within a season, hangers that snapped in a windstorm. This guide is the pattern and the lessons I wish someone had handed me before I started.
Whether you’re a total beginner who’s only ever made a granny square, or an advanced crocheter looking to add a new item to your craft fair table, you’ll find the full pattern breakdown, materials list, sizing charts, color ideas, and answers to the questions I get asked most often about crochet wind spinners.
What Is a Wind Spinner Crochet Pattern?
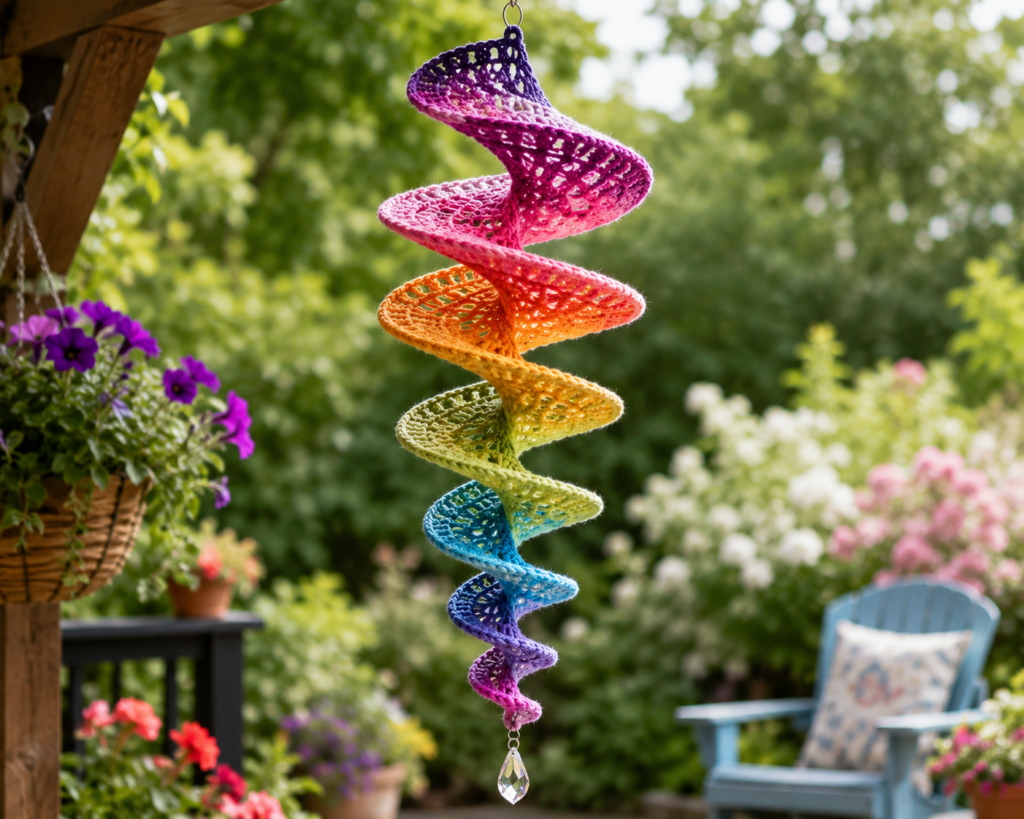
A crochet wind spinner is a spiral-shaped hanging decoration made by crocheting a long, tapered strip (or a flat circle that’s later cut and blocked into a spiral) and then shaping it into a coil that twists freely in the breeze. Unlike knitted or fabric spinners, crochet versions have texture and stitch definition that catch light beautifully, which is part of why they’ve become such a popular outdoor crochet project.
Most patterns fall into one of two categories:
- Spiral-worked patterns, where you crochet directly in a spiral shape from the center out, increasing steadily so the piece naturally curls.
- Cut-and-block patterns, where you crochet a flat circle (like a doily), then cut it into a continuous spiral strip and block it into shape — similar to how you’d cut a spiral out of a sheet of paper.
Both approaches are valid, and honestly, I use both depending on the yarn and the finished look I’m going for.
Why Crochet Wind Spinners Are So Popular
Search interest in DIY wind spinners spikes every spring, and it’s not hard to see why. They’re one of the few crochet projects that photograph beautifully outdoors, which makes them a Pinterest and Instagram favorite. They’re also a fantastic stash-buster — a single spinner rarely needs more than one skein.
There’s also a practical appeal for crochet business owners. Wind spinners are lightweight to ship, quick to photograph, and priced well above their material cost, which is why you’ll see them all over Etsy shops each garden season.
Benefits of Crochet Wind Spinners
- Beginner-friendly base pattern — the core stitches are just single crochet, half double crochet, and increases.
- Low yarn cost — most spinners use one skein of worsted weight cotton or acrylic.
- Quick finish — a single spinner can be completed in one to three evenings.
- Highly customizable — color, size, and embellishments change the entire look.
- Great for craft fairs and Etsy — compact, lightweight, and visually striking in photos.
- Satisfying motion — unlike static decor, a spinner rewards you every time the wind picks up.
Magic Wind Spinner
Download the beautiful ad-free printable PDF with easy step-by-step instructions.
🛍️ Get Premium PDFSkill Level
This pattern is rated Beginner to Intermediate. If you can single crochet, half double crochet, and increase confidently, you can make a wind spinner. The only mildly tricky part is blocking the spiral into a clean, even twist — and that’s a technique, not a stitch, so it just takes a little practice.
Materials Needed
| Item | Purpose | Notes |
|---|---|---|
| Worsted weight cotton or acrylic yarn | Main spiral body | Cotton holds shape best outdoors |
| Crochet hook (see size chart) | Stitching the spiral | Match to yarn weight |
| Stitch marker | Marking round starts | Any scrap yarn works |
| Yarn needle | Weaving in ends | Blunt-tip tapestry needle |
| Fabric stiffener or starch | Holding the twist | Optional but recommended outdoors |
| Fishing line or clear nylon cord | Hanging | UV-resistant line lasts longer |
| Swivel clip or fishing swivel | Smooth spinning motion | Prevents cord from tangling |
| Scissors | Trimming yarn and cord | — |
| Blocking pins or T-pins | Shaping while drying | Rust-resistant pins only |
| Optional: beads, bells, charms | Embellishment | Add before final blocking |
Yarn Recommendations
I’ve tested wind spinners in cotton, acrylic, and blended yarns, and each has a different personality once it’s outside in real weather.
- 100% cotton (like a sturdy dishcloth cotton): My personal favorite for outdoor spinners. It holds a crisp stitch definition, resists sun-fading longer than acrylic, and doesn’t stretch out of shape in humidity.
- Acrylic worsted weight: Budget-friendly and comes in the widest color range, including neons and metallics. It’s more prone to UV fading over a full season, so it’s best for spinners you plan to rotate seasonally.
- Outdoor/weather-resistant yarn: A newer category of yarn made for outdoor projects (rugs, pillows, spinners). More expensive, but genuinely worth it if you’re selling finished pieces.
- Yarn to avoid: Wool and wool blends. They absorb moisture, can felt in the rain, and attract garden pests.
Best Crochet Hooks
Any standard hook works, but a few features make the process smoother:
- Ergonomic handle — you’ll be doing a lot of repetitive increases, so a comfortable grip matters.
- Inline hook head (like most steel or Clover Amour hooks) — gives more consistent tension for the increase rounds.
- Slightly smaller hook than the yarn label suggests — going down half a size creates a firmer fabric that blocks into a crisper spiral.
Yarn Weight Guide
| Weight # | Common Name | Best For Spinners |
|---|---|---|
| 2 | Fine / Sport | Small ornament-sized spinners |
| 3 | Light / DK | Medium spinners, more drape |
| 4 | Medium / Worsted | Most popular choice — best balance of body and detail |
| 5 | Bulky | Large statement spinners |
| 6 | Super Bulky | Oversized porch or garden spinners |
Hook Size Chart
| Yarn Weight | Hook Size (mm) | US Hook Size |
|---|---|---|
| 2 (Sport) | 3.5mm | E/4 |
| 3 (DK) | 4.0mm | G/6 |
| 4 (Worsted) | 5.0mm | H/8 |
| 5 (Bulky) | 6.0mm | J/10 |
| 6 (Super Bulky) | 8.0mm | L/11 |
Finished Size Chart
| Size | Approx. Diameter (blocked) | Yarn Weight Used | Best Use |
|---|---|---|---|
| Small | 6–8 inches | Sport/DK | Windowsill, ornament, gift tag |
| Medium | 10–14 inches | Worsted | Porch, patio, standard gift |
| Large | 16–20 inches | Bulky | Garden stake, statement piece |
| Extra Large | 22+ inches | Super Bulky | Yard centerpiece, craft fair showstopper |
Time Required
Most makers finish a medium worsted-weight spinner in 2 to 4 hours of active crochet time, plus 12 to 24 hours of drying time if you block it with starch or stiffener. I usually crochet mine over two evenings and let it dry overnight on a Saturday so it’s ready to hang by Sunday morning.
Crochet Abbreviations
| Abbreviation | Meaning |
|---|---|
| ch | chain |
| sl st | slip stitch |
| sc | single crochet |
| hdc | half double crochet |
| dc | double crochet |
| inc | increase |
| st(s) | stitch(es) |
| rep | repeat |
| sp | space |
| RS | right side |
| WS | wrong side |
| YO | yarn over |
Printable Materials Checklist
- [ ] 1 skein worsted weight cotton or acrylic yarn
- [ ] Crochet hook (matched to yarn weight)
- [ ] Stitch marker
- [ ] Yarn/tapestry needle
- [ ] Fabric stiffener or liquid starch
- [ ] Clear fishing line or nylon cord
- [ ] Swivel clip
- [ ] Rust-resistant blocking pins
- [ ] Scissors
- [ ] Optional: beads, bells, or charms
- [ ] Optional: wide-mouth jar (for stiffener soaking)
Step-by-Step Construction Overview
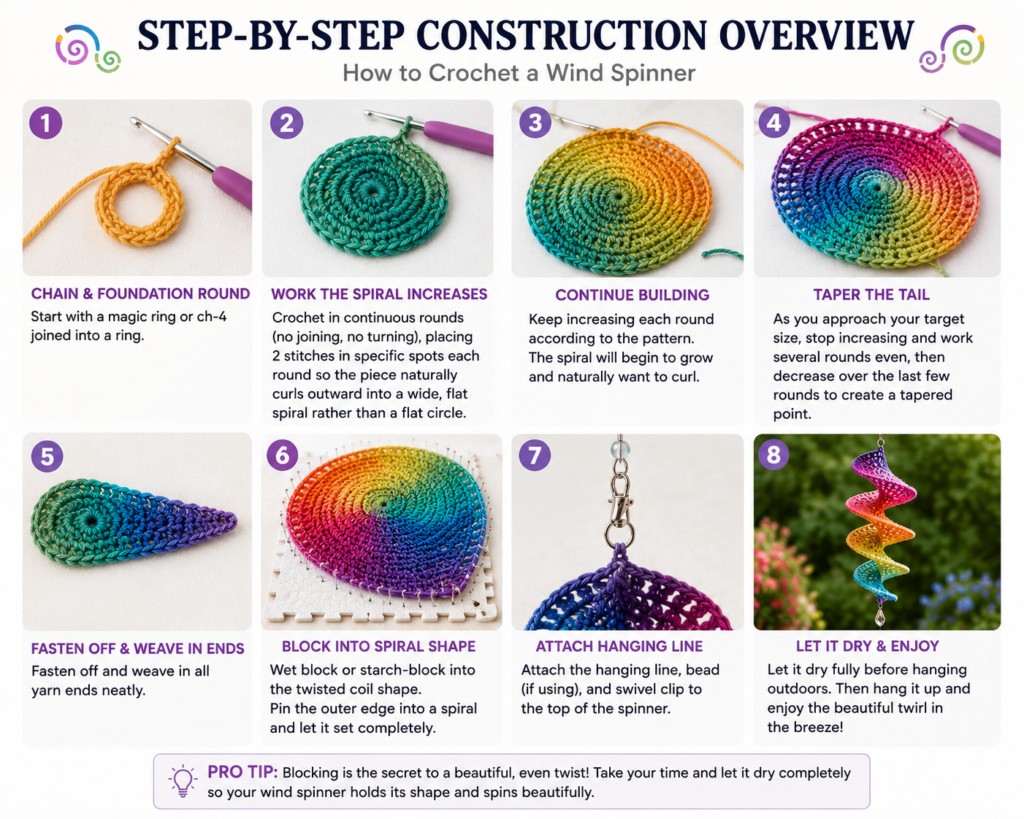
- Chain and foundation round: Start with a magic ring or ch-4 joined into a ring.
- Work the spiral increases: Crochet in continuous rounds (no joining, no turning), placing 2 stitches in specific spots each round so the piece naturally curls outward into a wide, flat spiral rather than a flat circle.
- Taper the tail: As you approach your target size, stop increasing and work several rounds even, then decrease over the last few rounds to create a tapered point.
- Fasten off and weave in ends.
- Wet block or starch-block into the twisted coil shape (full instructions below).
- Attach the hanging line and swivel clip.
- Let it dry fully before hanging outdoors.
Magic Wind Spinner
Download the beautiful ad-free printable PDF with easy step-by-step instructions.
🛍️ Get Premium PDFHow to Join Spiral Sections
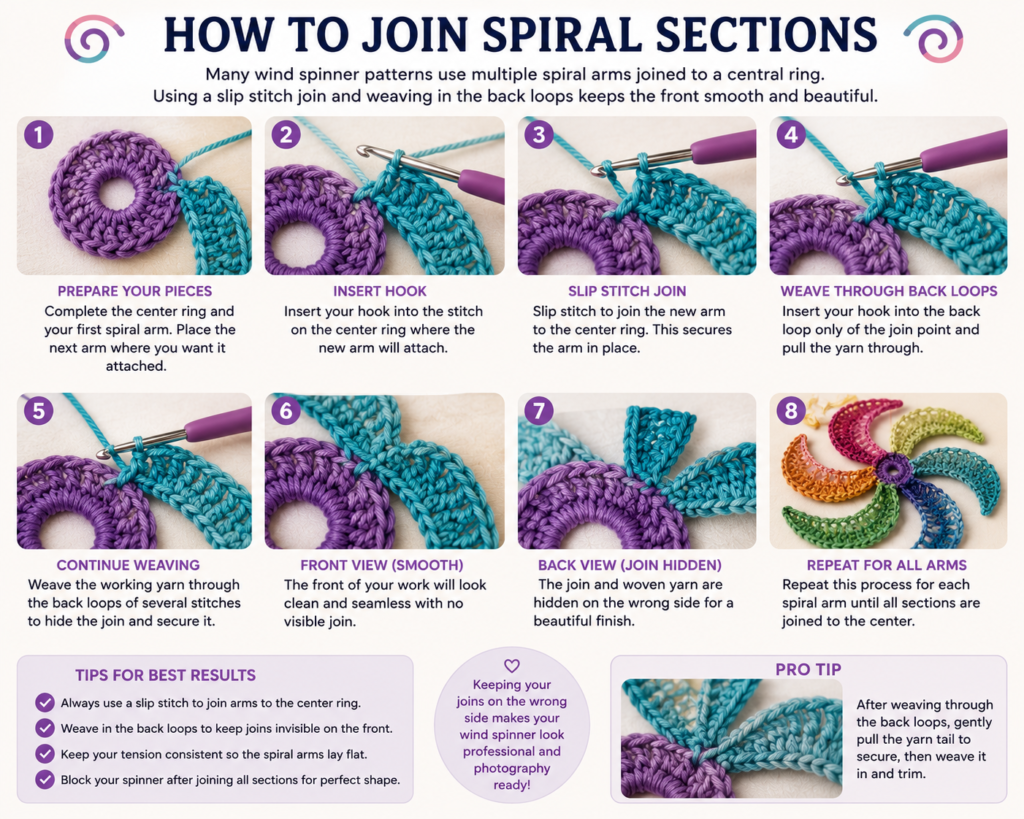
If your pattern is worked in multiple spiral arms (common in multi-tier spinners), join each arm to the central ring using a slip stitch join, then weave the working yarn through the back loops of the join point before continuing. Keeping joins on the wrong side keeps the front face of the spinner smooth for photography and display.
How to Create Perfect Twists
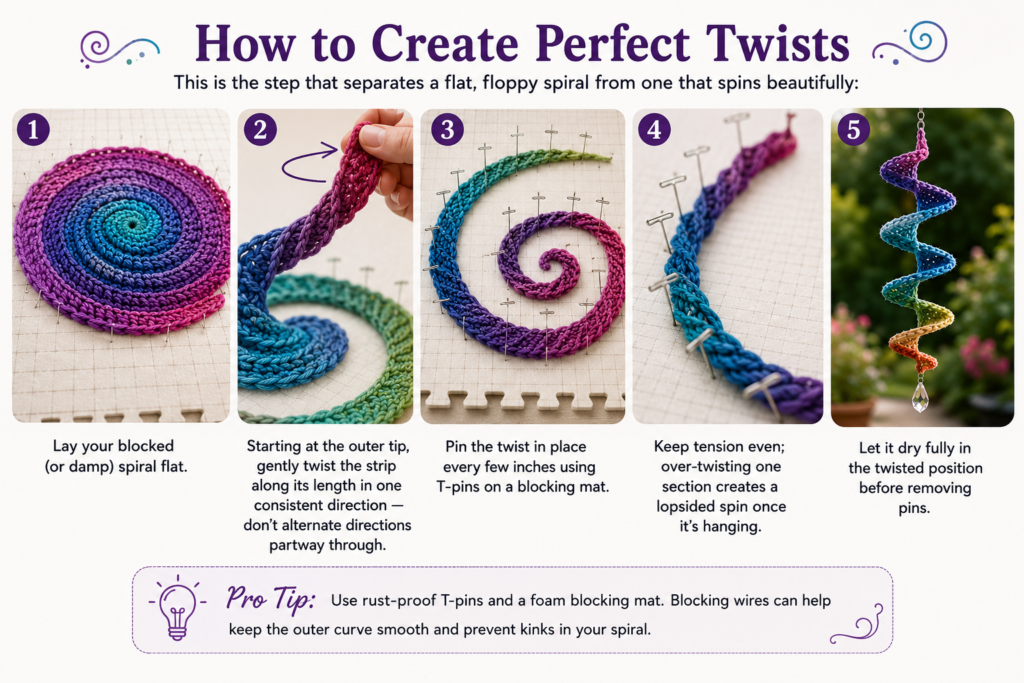
This is the step that separates a flat, floppy spiral from one that spins beautifully:
- Lay your blocked (or damp) spiral flat.
- Starting at the outer tip, gently twist the strip along its length in one consistent direction — don’t alternate directions partway through.
- Pin the twist in place every few inches using T-pins on a blocking mat.
- Keep tension even; over-twisting one section creates a lopsided spin once it’s hanging.
- Let it dry fully in the twisted position before removing pins.
How to Block a Crochet Wind Spinner
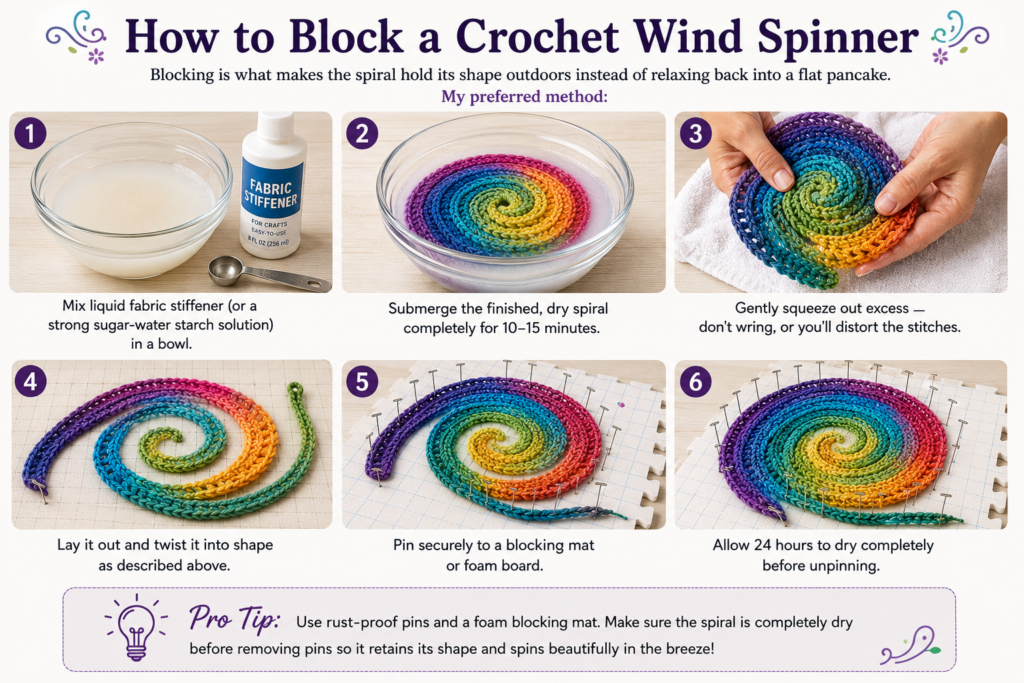
Blocking is what makes the spiral hold its shape outdoors instead of relaxing back into a flat pancake. My preferred method:
- Mix liquid fabric stiffener (or a strong sugar-water starch solution) in a bowl.
- Submerge the finished, dry spiral completely for 10–15 minutes.
- Gently squeeze out excess — don’t wring, or you’ll distort the stitches.
- Lay it out and twist it into shape as described above.
- Pin securely to a blocking mat or foam board.
- Allow 24 hours to dry completely before unpinning.
How to Hang a Wind Spinner
Use a swivel clip (the kind used in fishing tackle) between your hanging cord and the spinner itself. Without a swivel, the cord itself twists tight over time and the spinner stops spinning freely. Hang from a shepherd’s hook, porch beam, or tree branch with enough clearance that the widest point doesn’t brush against a wall or railing.
Indoor vs Outdoor Display Ideas
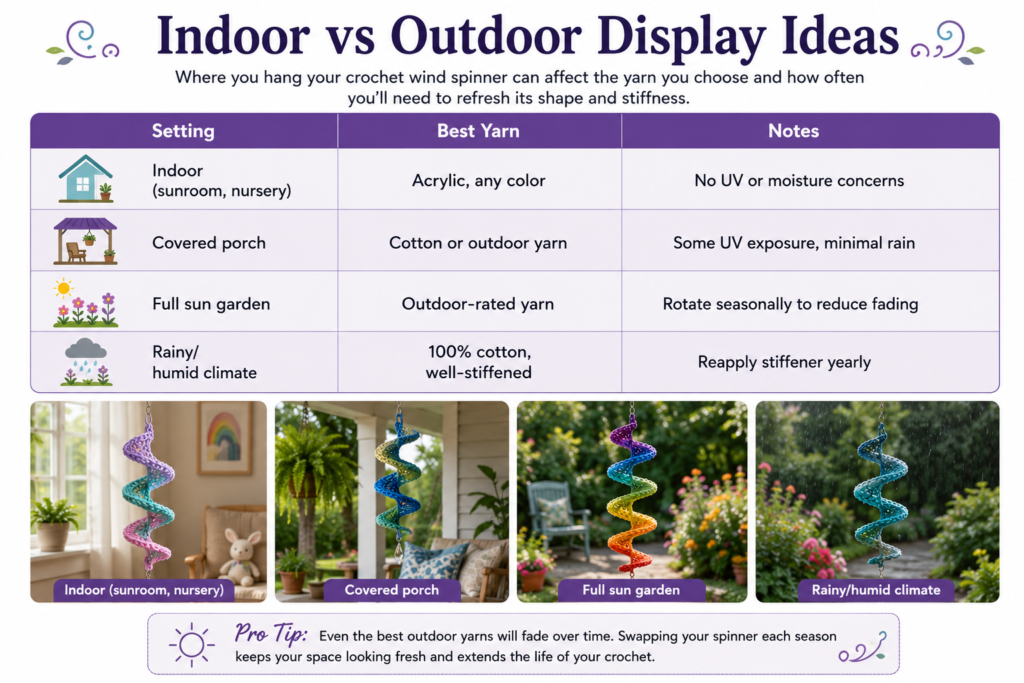
| Setting | Best Yarn | Notes |
|---|---|---|
| Indoor (sunroom, nursery) | Acrylic, any color | No UV or moisture concerns |
| Covered porch | Cotton or outdoor yarn | Some UV exposure, minimal rain |
| Full sun garden | Outdoor-rated yarn | Rotate seasonally to reduce fading |
| Rainy/humid climate | 100% cotton, well-stiffened | Reapply stiffener yearly |
Best Color Combinations
- Sunset ombré: coral, orange, gold
- Coastal: seafoam, white, sandy tan
- Classic garden: sage green, cream, dusty pink
- High-contrast modern: black, white, single pop of red
Seasonal Color Ideas
Rainbow Wind Spinner
A full-spectrum spiral using six to seven solid colors in ROYGBIV order — one of the most requested custom colorways in my shop.
Christmas Wind Spinner
Deep red, forest green, and white, optionally with a metallic silver accent round.
Spring Wind Spinner
Pastel pink, lavender, mint, and butter yellow, worked in soft transitions.
Halloween Wind Spinner
Black, orange, and a touch of purple, with a small bat or spider charm added at the tip.
Patriotic Color Ideas
Classic red, white, and navy blue, striped or blocked in sections — a strong seller around early summer holidays.
Customization Ideas
Adding Beads
Thread wooden or glass beads onto your yarn before starting, then slide them into place every few rounds for added weight and movement.
Adding Bells
A small jingle bell at the spiral’s tip adds sound as well as motion — popular for porch and garden versions.
Using Metallic Yarn
Holding a fine metallic thread together with your main yarn for the outer rounds adds a subtle shimmer without overwhelming the stitch definition.
Gradient Yarn Ideas
Self-striping or gradient cakes eliminate the need for color changes and produce a smooth, professional-looking ombré spiral with zero extra effort.
Magic Wind Spinner
Download the beautiful ad-free printable PDF with easy step-by-step instructions.
🛍️ Get Premium PDFCommon Mistakes to Avoid
- Skipping the stiffening step — the spiral will look great fresh off the hook and go completely limp within a week outside.
- Twisting inconsistently — mixing twist direction partway through creates an off-balance spin.
- Using wool outdoors — it holds moisture and can felt or attract insects.
- Hanging without a swivel clip — the cord twists tight and the spinning stops.
- Using rusting pins during blocking — they leave permanent stains on light-colored yarn.
- Under-sizing the hook — too loose a gauge makes a floppy fabric that won’t hold a crisp twist.
Pro Crochet Tips
- Work a gauge swatch first if you’re substituting yarn weights — spinner patterns are sensitive to stitch density.
- Starch in small batches; over-diluted stiffener won’t hold outdoor humidity.
- Photograph your finished spinner mid-spin (a small fan works great) for far better Etsy and Pinterest engagement than a static photo.
- Keep a small notebook of your row/round counts — it makes replicating a customer’s favorite size much faster.
Care Instructions
- Bring indoors during severe storms or high winds.
- Re-stiffen once a year for outdoor pieces, especially after a rainy season.
- Spot clean with a damp cloth; avoid full submersion once display-ready unless re-blocking.
- Store flat or gently coiled in a drawer during winter months, not folded sharply.
Selling Finished Wind Spinners
Wind spinners consistently perform well on Etsy from March through August. A few things that have moved the needle in my own shop:
- List multiple color variations of the same base pattern rather than one-off designs.
- Photograph outdoors in natural light, ideally with visible motion blur.
- Offer a small and large size option — many buyers purchase both.
- Mention yarn fiber content and weather-resistance directly in the listing; buyers ask about this constantly.
On sale products
-
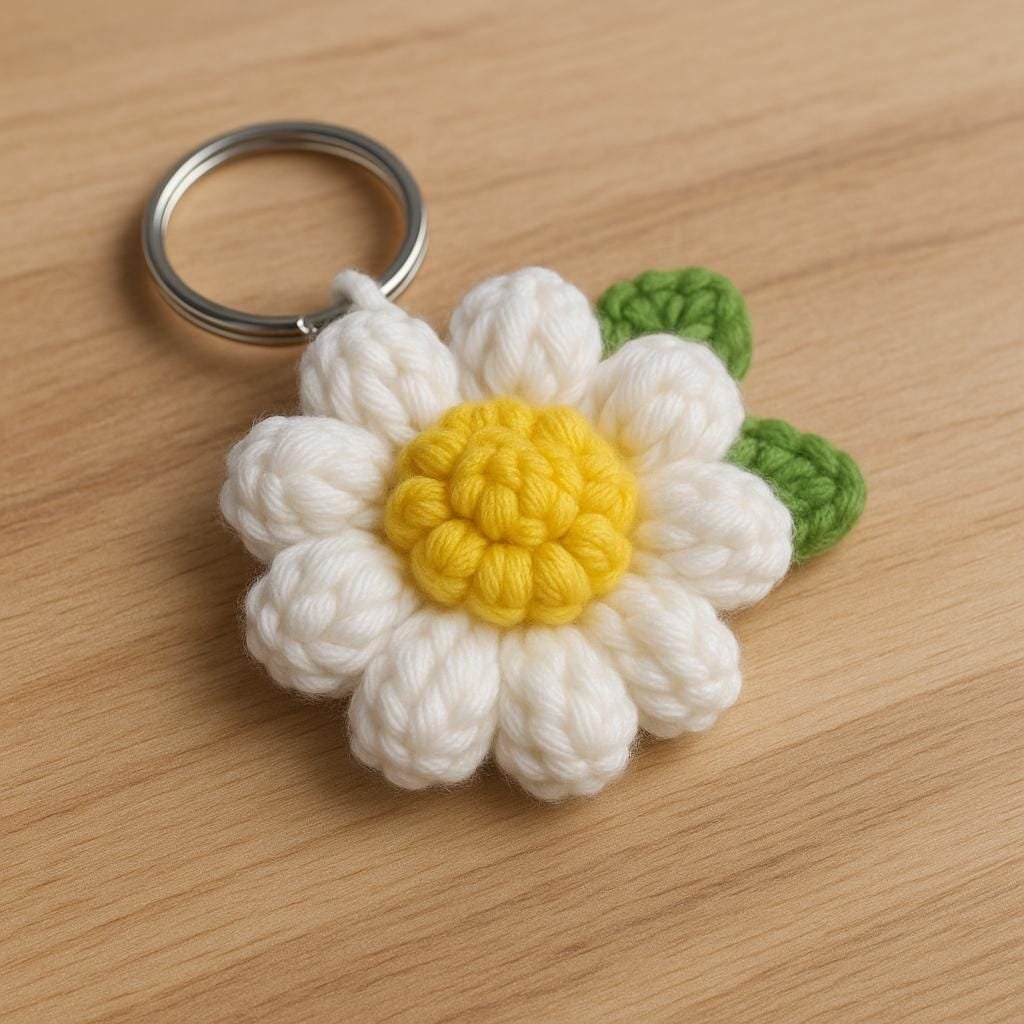
3D Daisy Keychain Crochet Pattern | Puff Stitch Flower PDF | Easy Crochet Gift Tutorial
$5.00$3.00 -
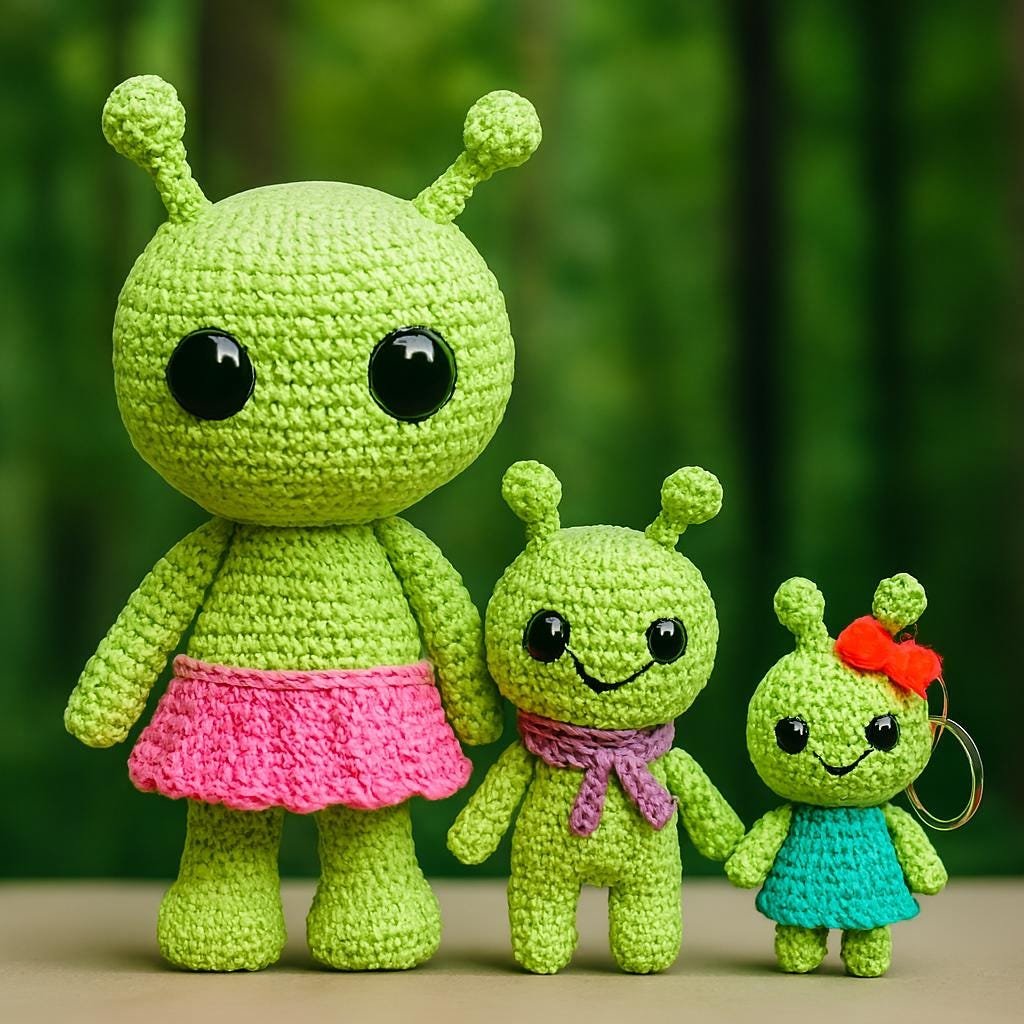
Alien Crochet Pattern Bundle, Amigurumi Plushie, Keychain Toy (PDF Download)
$6.00$3.00 -
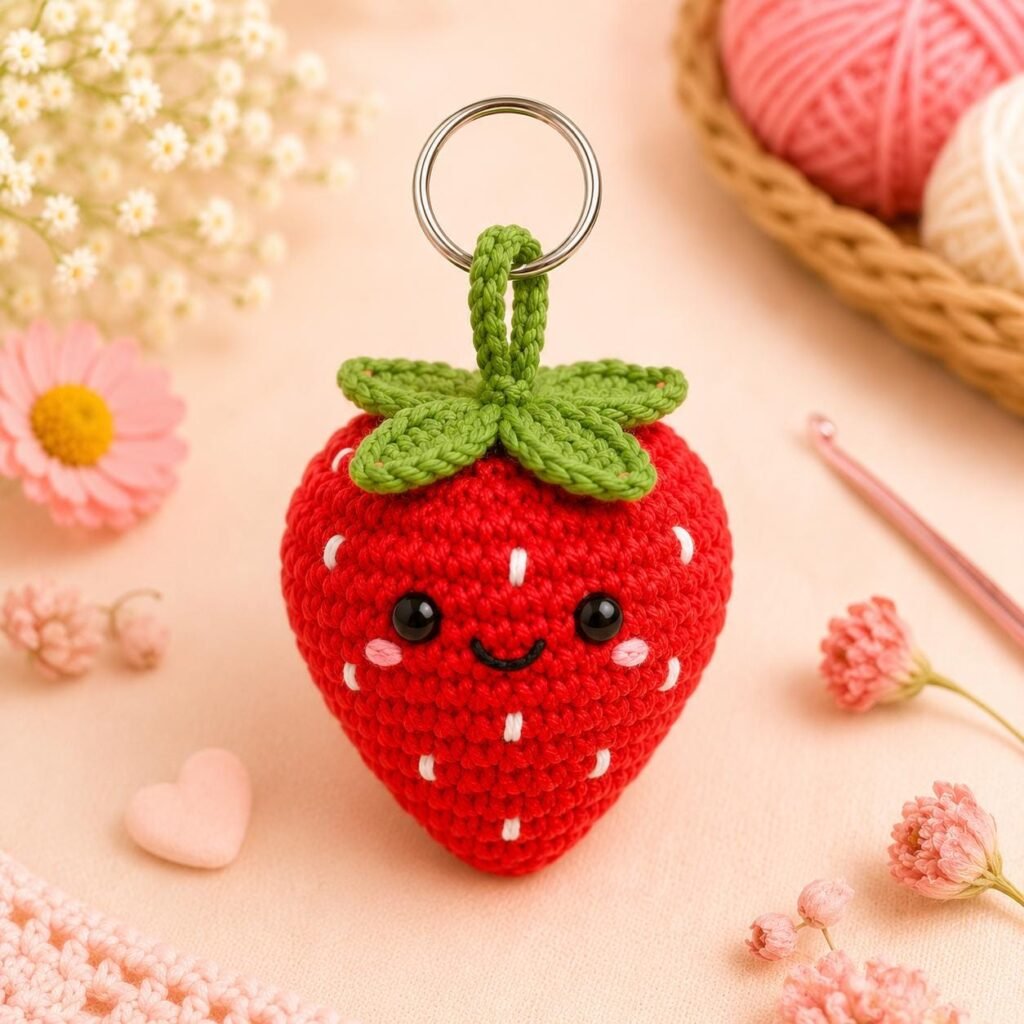
Amigurumi Fruit Keychain PDF, Kawaii Bag Charm Tutorial, Beginner DIY Gift Project, Easy Handmade
$5.00$3.00 -
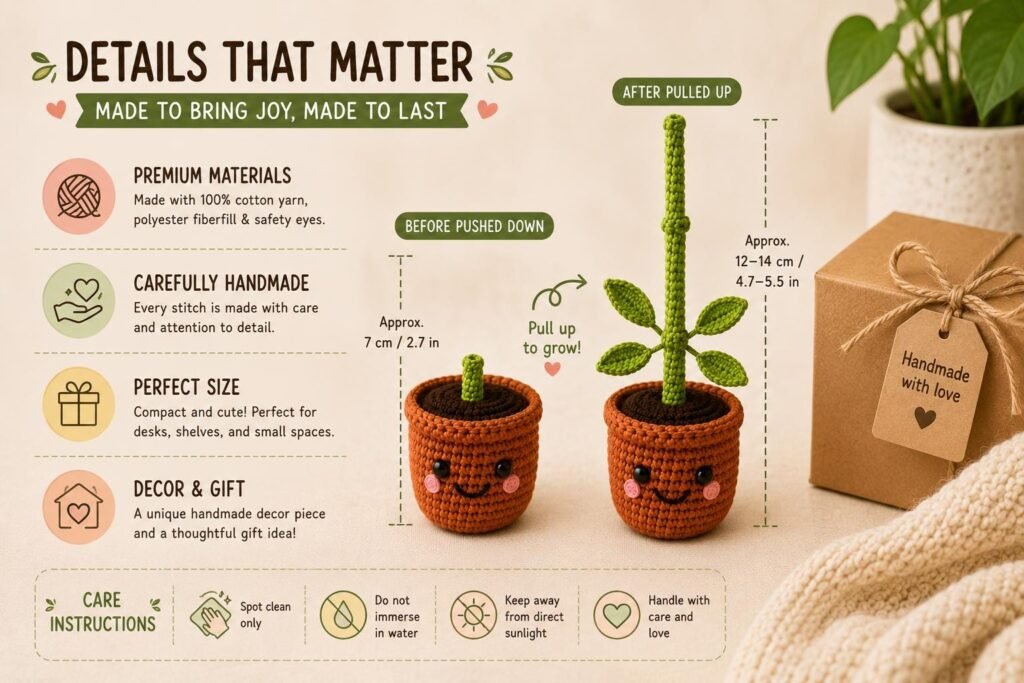
Amigurumi Plant Crochet Pattern PDF | Interactive Pull & Grow Pot Plant For Beginners
$6.00$3.00 -
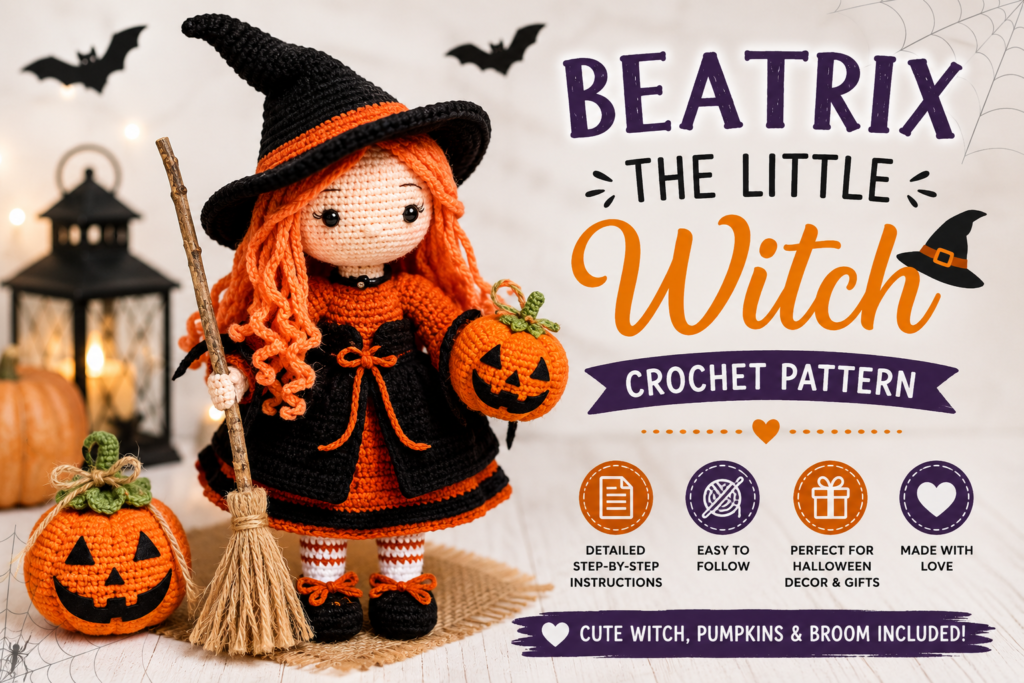
Beatrix the Little Witch Crochet Pattern PDF
$6.00$3.00
Licensing Information
If you’re selling finished wind spinners made from someone else’s written pattern, check that designer’s specific policy — most independent designers allow selling finished items but do not allow you to resell, republish, or teach the written pattern itself without permission. Always credit the pattern designer in your listing description as a best practice, even when it’s not strictly required.
Frequently Asked Questions
1. What yarn is best for a wind spinner? Sturdy worsted weight cotton holds shape and color best outdoors, though acrylic works well for indoor or seasonal pieces.
2. Do I need to stiffen my wind spinner? For outdoor display, yes — stiffening is what keeps the twist from relaxing back to flat over time.
3. What hook size should I use? Match your hook to your yarn weight using the chart above; a slightly smaller hook than recommended creates a firmer, more durable fabric.
4. How long does a wind spinner take to make? Most medium-sized spinners take 2–4 hours of crochet time plus a full day of drying.
5. Can I make a wind spinner without cutting my crochet piece? Yes — spiral-worked patterns are crocheted directly into a spiral shape and never need cutting.
6. Why won’t my spinner twist properly? Uneven twisting direction or insufficient blocking time are the two most common causes.
7. What’s the best way to hang a wind spinner? Use a swivel clip between the cord and spinner to allow free, tangle-free rotation.
8. Can I use cotton yarn outdoors? Yes, cotton is one of the most weather-resistant natural fiber choices for outdoor crochet.
9. Is wool a good choice for wind spinners? No — wool absorbs moisture and can felt or attract pests outdoors.
10. How big should a beginner spinner be? Start with a medium size (10–14 inches) using worsted weight yarn for the most manageable first project.
11. Can I add beads or bells to my spinner? Yes, both are popular additions — thread beads on before starting, and attach bells at the tip after blocking.
12. How do I keep colors from fading in the sun? Choose UV-resistant or outdoor-rated yarn, and rotate spinners out of direct sun when possible.
13. What’s the difference between spiral-worked and cut spirals? Spiral-worked patterns are crocheted directly into shape; cut spirals start as a flat circle that’s later cut and blocked into a coil.
14. Can beginners really make this pattern? Yes — the stitches involved are single crochet, half double crochet, and basic increases.
15. How much yarn do I need? A single medium-sized spinner typically uses one standard skein of worsted weight yarn.
16. Can I sell items made from a purchased pattern? Usually yes for finished items, but check the individual designer’s specific terms before selling.
17. What’s the best stiffening method? Liquid fabric stiffener gives the most durable, weather-resistant hold for outdoor pieces.
18. How often should I re-stiffen an outdoor spinner? About once a year, or sooner if it’s been through a particularly rainy season.
19. Can I make a wind spinner with bulky yarn? Yes — bulky yarn creates a larger, faster-finishing statement piece, though it uses more yarn overall.
20. What if my spiral looks flat instead of curled? You likely need more increase rounds, a firmer gauge, or a longer blocking/stiffening time.
Magic Wind Spinner
Download the beautiful ad-free printable PDF with easy step-by-step instructions.
🛍️ Get Premium PDFConclusion
A good wind spinner crochet pattern rewards patience twice — once while you’re stitching the spiral, and again every time the wind catches it outside your window. My best advice after a dozen of these: don’t rush the blocking step, choose your yarn for the weather it’ll actually live in, and don’t be afraid to experiment with color combinations that feel a little bold. That’s usually the version that ends up being everyone’s favorite.